
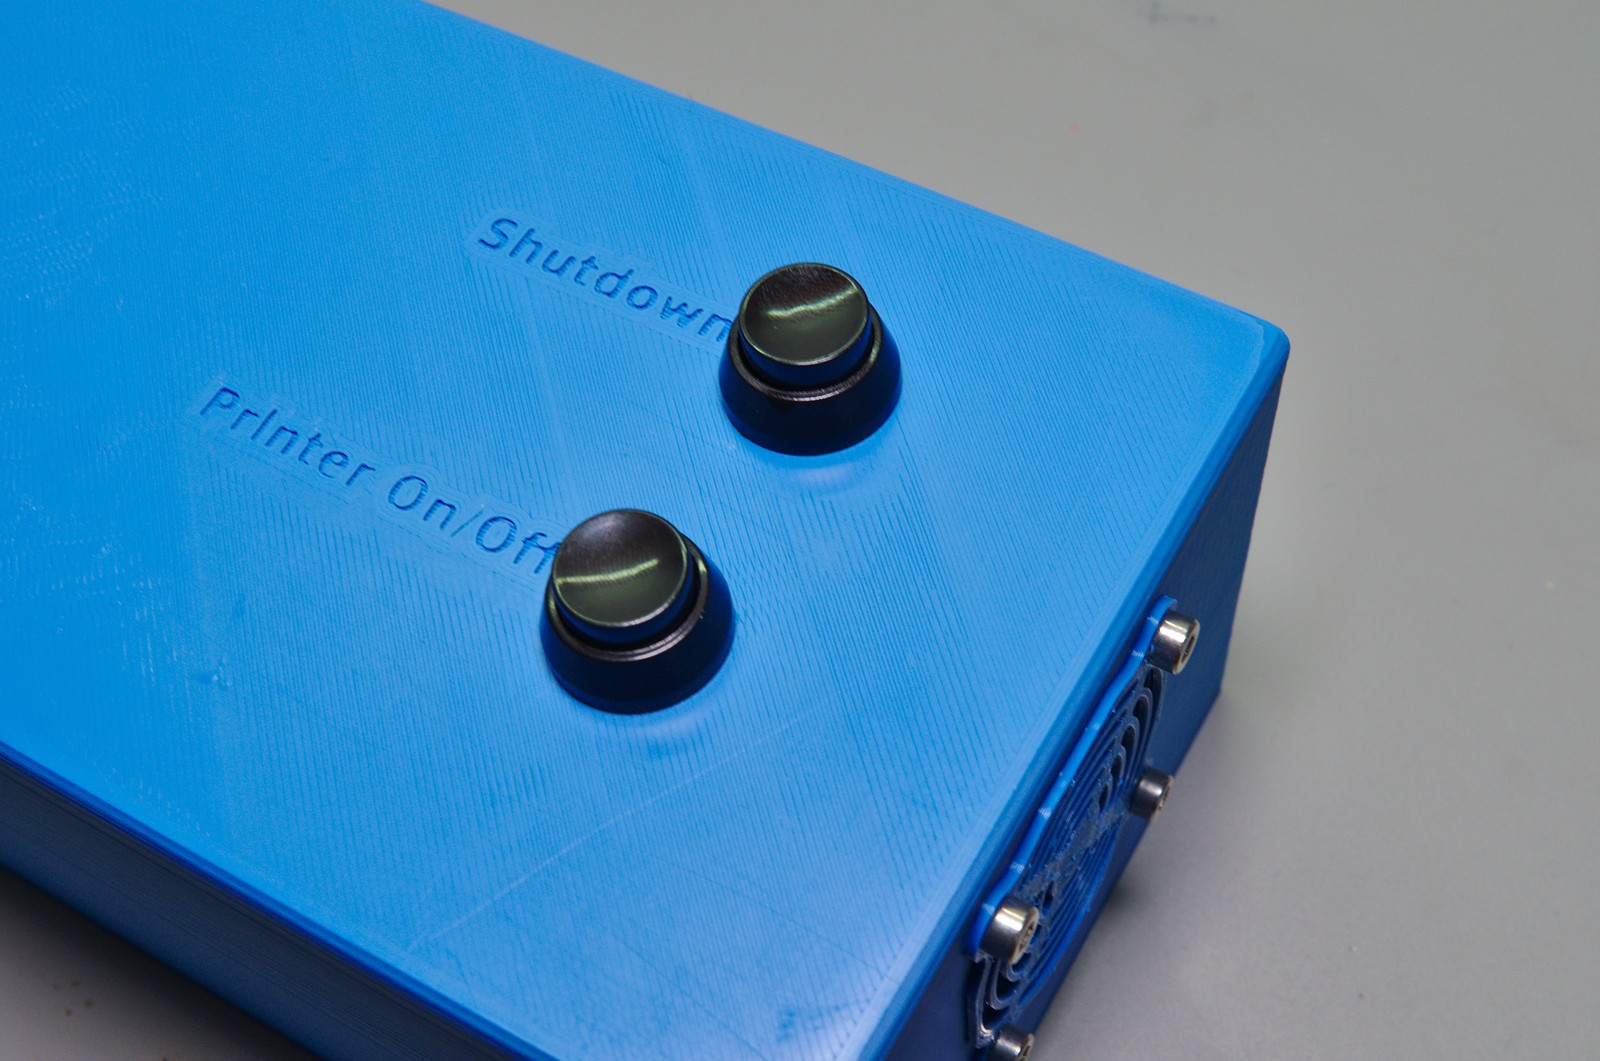
This box contains a Raspberry Pi running the fabulous OctoPrint / OctoPi, a 5 V power supply and an SSR. It allows you to remotely turn on and off your attached 3D printer, either by using the web interface, by sending G-Code or with a custom system command, which is needed to use the feature through the Telegram plugin. Two hardware buttons are also available to power on/off the printer or send a shutdown command to properly power off the Pi.
Next to the hardware setup you will need to install three additional plugins:
- OctoPrint-Enclosure
- PSU Controls
- System Command Editor
All are available in the OctoPrint Repository.
SAFETY WARNING
Instructions
Hardware Setup
I used the following components:
- Raspberry Pi 3 Model B
- Meanwell EPS-15-5 (5V-15W open frame power supply)
- Fotek SSR-40DA
- 2x 12mm push buttons
- 5V 40mm fan
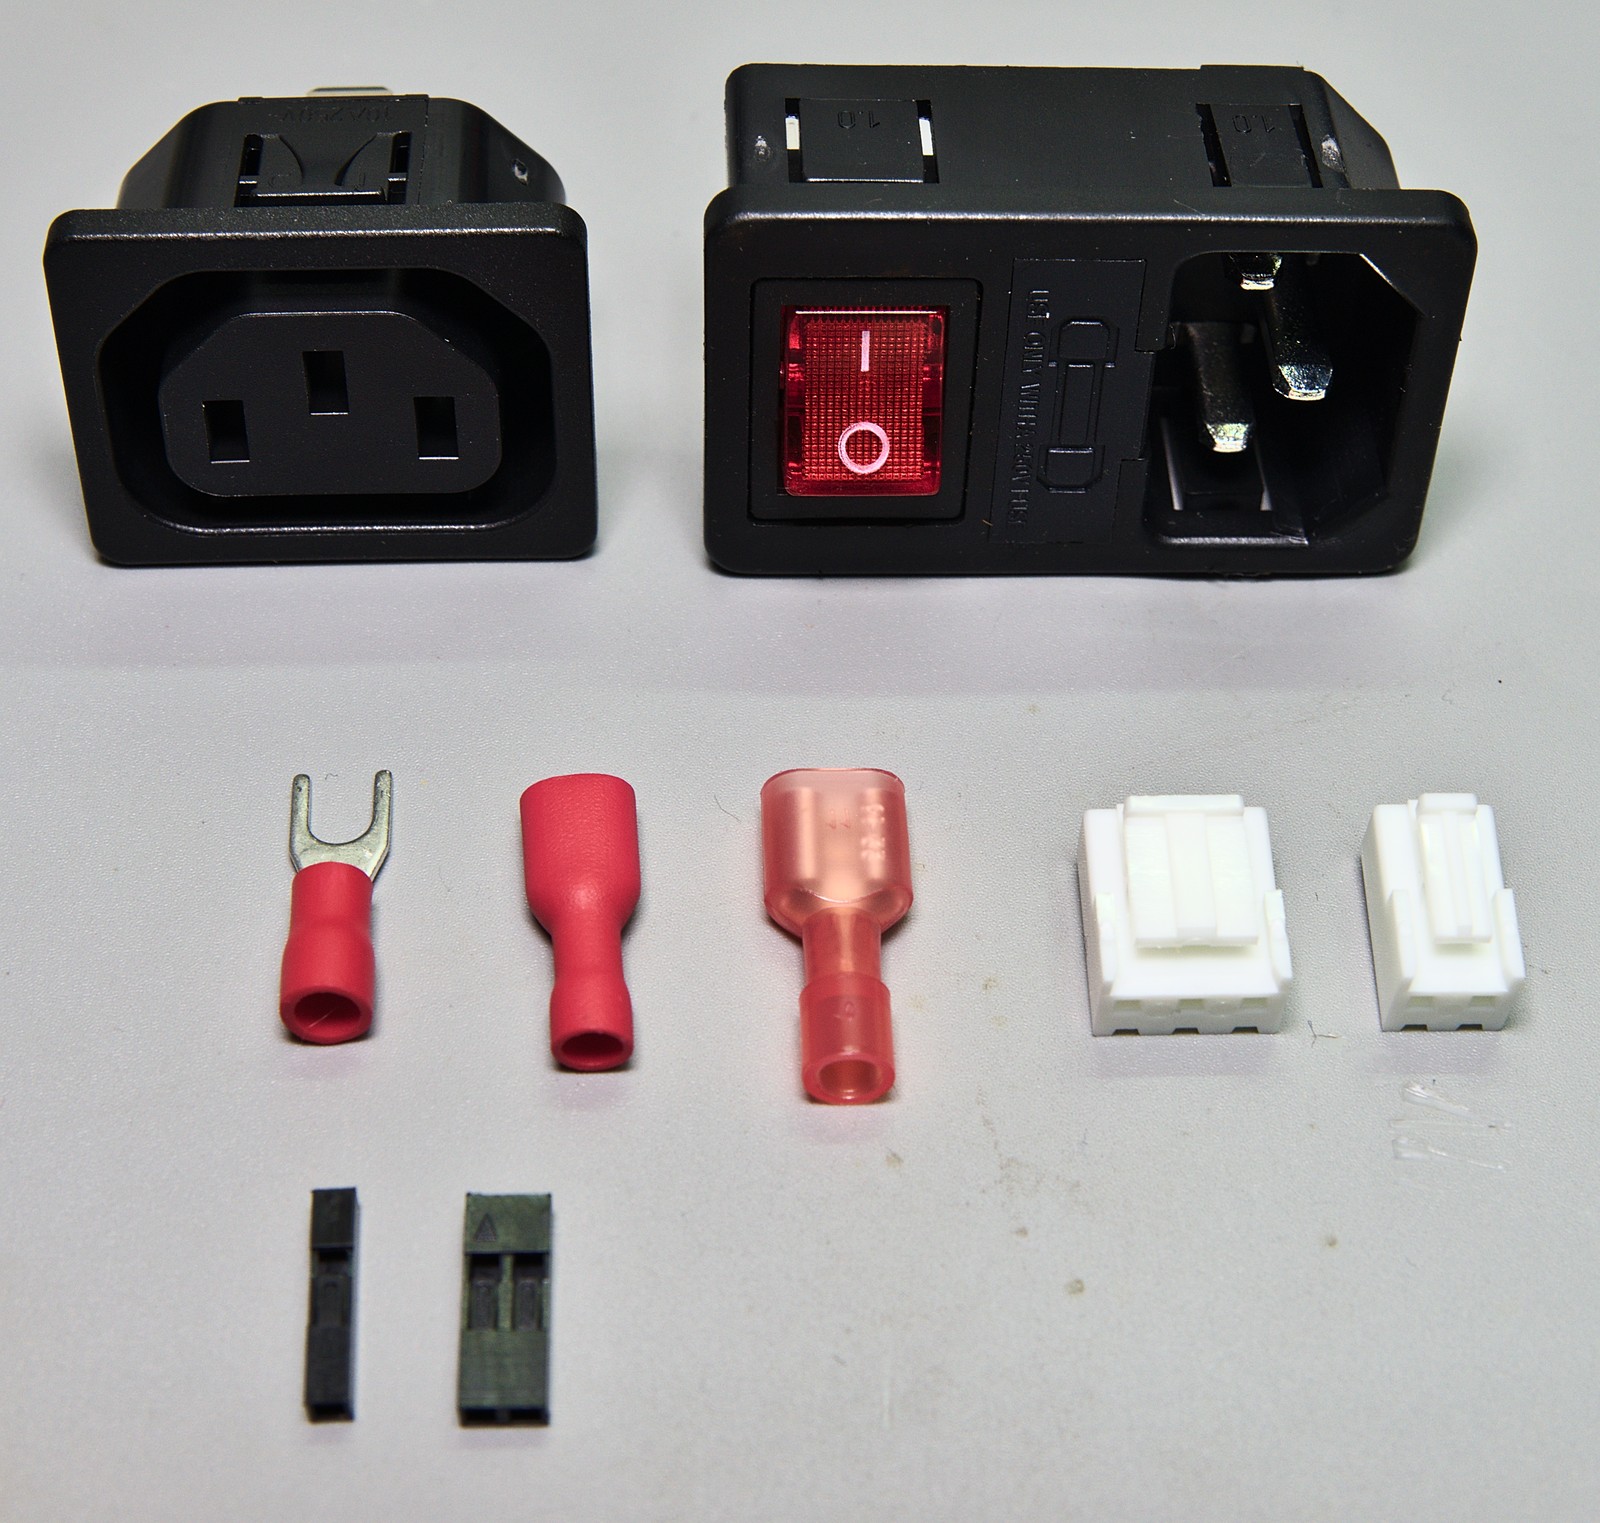
- power connector with switch and 2A fuse (adjust the fuse depending on your printer)
- power socket outlet
- 4mm and 6.35 mm insulated flat receptacles
- insulated crimp connectors
- jump pin wire connectors
- JST VH connectors (for the PSU, 3P and 2P)
- M3 screws
- M3 threaded inserts (5×5 mm)
- M2.5 threaded inserts (4×3.8 mm)
- M3 thermoplastic screws (for the case)
The SSR is a little overpowered, I just happened to have one lying around. On the other side this allows me to use it without cooling.
NOTE: When I built this I didn’t have any M2.5 threaded inserts for the Raspberry Pi. I therefore used M3 screws, too, and widened the mounting holes with an 3.2 mm drill. It works fine but is not optimal. Therefore two cases are included in the download. The M2.5 version is untested, though.dddddddddddddd
Wire everything up as indicated in the schematic ddddabove. You can of course use any other GPIO pins, that’s up to you.


Software setup
The configuration for the three OctoPrint plugins is available as screenshots in the attached archive. It’s all pretty straight forward. As it turns out the GPIO nunbering scheme set in the PSU Control plugin also affects the Octoprint-Enclosure configuration, so make sure they are consistent. You can debug the software configuration by logging into the Pi via SSH and check proper outputs and inputs via
user@host# gpio readall