
In this small tutorial I will show you how to start programming Atmel microcontrollers under GNU/Linux, Debian in particular. It covers all steps starting with the software prerequisites, setting up a minimal circuit to actually flashing the microcontroller with the obligatory “Hello, World!” program. There are a few stumbling blocks that I hit along the way and I will explicitly point them out and show what to do about them. Hopefully this will save you some frustration.
Atmel AVR Microcontrollers
When it comes to microcontrollers for hobbyist projects there are basically two choices out there: Atmel’s AVR Risc and PICmicros by Microchip Technologies. I looked into many tutorials before I made my choice and found the Atmel AVRs to be better documented and, more importantly, all necessary software including the compiler is available as free software and already included in most Linux distributions. PICmicro compilers are harder to find, often non-free and probably more targeted towards Windows users. The hardware features are comparable for both, so Atmel it is!
Atmel, meanwhile purchased by Microchip, manufactures many different microcontrollers, from very basic to feature-rich ones. The usual suspects for personal uses are:
- tinyAVR
- megaAVR
- AVR XMEGA
The first two are 8bit processors and almost identical to work with while the ATXMega is a 8/16bit processor and provides advanced features like cryptography functions, speedy ADCs, USB support etc. I will concentrate on the ATTiny / ATMega processors as they are sufficiently powerful for most applications and used by many others (including the popular Arduino boards). There exists a manifold of different processors with different FLASH sizes (for your program code), RAM sizes, number of IO pins, speed ratings, low-voltage and pico-power versions etc. I won’t go into much detail, there are other sources of good information about the different versions. A popular choice is the ATMega328 CPU or its smaller sibling the ATMega168, those are the ones I use. For very small projects you can also choose an ATTiny processor of your choice. Anyhow, it doesn’t really matter which one you use, many of them are pin-compatible anyway.
The Hardware
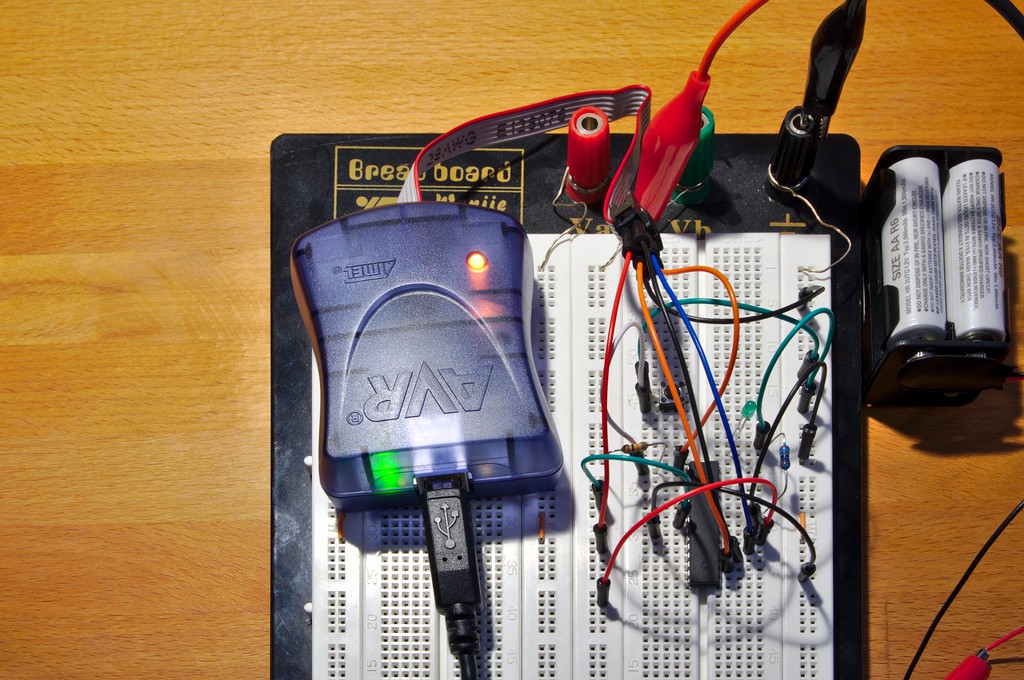
Next to the processor itself we need a programmer. Although you can build your own I recommend buying an assembled one, such as the Atmel AVRISP mkII (now superseeded by the Atmel-ICE). It has a very reasonable price around 30 € and will just work. Especially in the beginning it’s too cumbersome to figure out whether your DIY-programmer is working correctly or your circuit is failing.
The AVRISP mkII is a USB device, no legacy hardware required. It has two status LEDs, an internal one that turns green if the communication with the computer is OK and an external one that shows the status of the connection to your ATMega. One thing to note: this device cannot power your target circuitry, you will need a separate power supply (three AA-batteries work just fine).
Programming Circuit
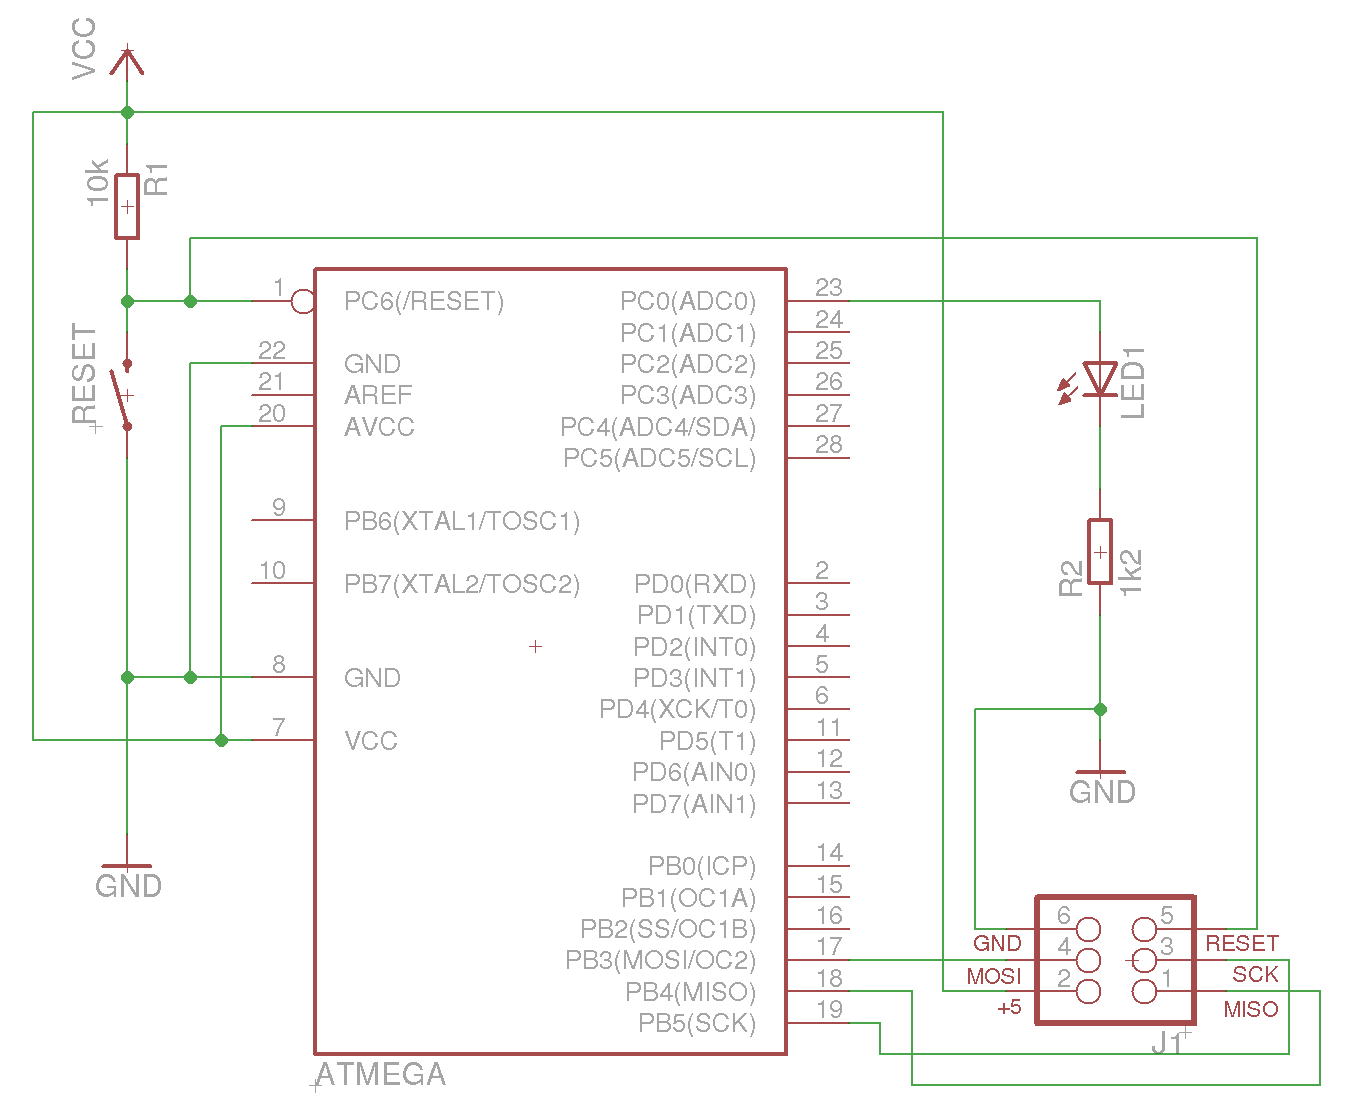
Now it’s time to set up a minimal circuit to program the controller. We will also add an (optional) reset button as well as an LED for the “Hello, World!” program. Here’s the circuit we will use:
Note, that this is a very minimal circuit. In a real project there will be more components, i.e. capacitors to filter the power supply, to filter the reset-button response, a crystal oscillator etc. The Atmel Application Notes are a good place to start looking into real-world basic circuits (you will receive a copy with your programmer).
Once this is set up we can go on to the software prerequisites.
The Software
Most GNU/Linux distributions should ship with all the tools necessary and they can be installed with the respective package manager. The required packages are:
- GNU GCC-AVR
- AVRDude
- Eclipse with CDT and AVR Eclipse plugin (optional, but really neat)
On Debian you can install everything with the following commands:
root@host ~ $ apt-get install avrdude gcc-avr avr-libc eclipse-cdt binutils-avrThe AVR Eclipse plugin is not available from the Debian repository, you’ll have to install it manually. Instructions can be found on the website.
AVRDude
Once the software is installed we can try to talk to the programmer. Connect it to your computer and try to use it with AVRDude like this (if you don’t use an ATMega168 you will have to adapt the -p parameter):
nakugard@host: ~ & avrdude -c avrisp2 -P usb -p m168 -n
avrdude: usb_open(): cannot read serial number "error sending control message: Operation not permitted"
avrdude: usb_open(): cannot read product name "error sending control message: Operation not permitted"
avrdude: usbdev_open(): error setting configuration 1: could not set config 1: Operation not permitted
avrdude: usbdev_open(): did not find any USB device "usb"
First bummer. 🙁 We are not allowed to talk to the programmer. If it works for you in the first place consider yourself lucky. In my case I had to fiddle with udev permissions to get it done. Create the following file and restart the udev system.
SUBSYSTEM!="usb", ACTION!="add", GOTO="avrisp_end"

# Atmel Corp. JTAG ICE mkII
ATTR{idVendor}=="03eb", ATTR{idProduct}=="2103", MODE="660", GROUP="dialout"
# Atmel Corp. AVRISP mkII
ATTR{idVendor}=="03eb", ATTR{idProduct}=="2104", MODE="660", GROUP="dialout"
# Atmel Corp. Dragon
ATTR{idVendor}=="03eb", ATTR{idProduct}=="2107", MODE="660", GROUP="dialout"

LABEL="avrisp_end"
Restart the udev system like this:
root@host: ~ $ service udev restartWith this configuration every user who belongs to the dialout group can now access the programmer. Don’t forget to add yourself to that group and logout/login (or use su). You might have to reconnect your programmer, too. Next your output should look like this:
nakugard@host: ~ $ avrdude -c avrisp2 -P usb -p m168 -n

avrdude: AVR device initialized and ready to accept instructions

Reading | ################################################## | 100% 0.00s

avrdude: Device signature = 0x1e9406

avrdude: safemode: Fuses OK

avrdude done. Thank you.
Working! 😀 We used the -n option to to ensure nothing is written on the controller, it just connects to it and checks everything is alright. For a more detailed output try using additionally the -v option.
One more thing: if the above command still fails, e.g. it reports a wrong device signature, it might be due to a wrong bit clock setting. The bit clock defaults to about 1 us and seemed to be too fast for my setup, this was the second not-so-obvious problem I encountered. It is defined with the -B parameter and I had to increase it to a value of 4 to make it work. For future use of AVRDude you can easily define all these things in the ~/.avrduderc file, e.g. like this:
default_programmer = "avrisp2";
default_serial = "usb";
default_bitclock = 4;
Adjust the values to your needs.
Hello, World!
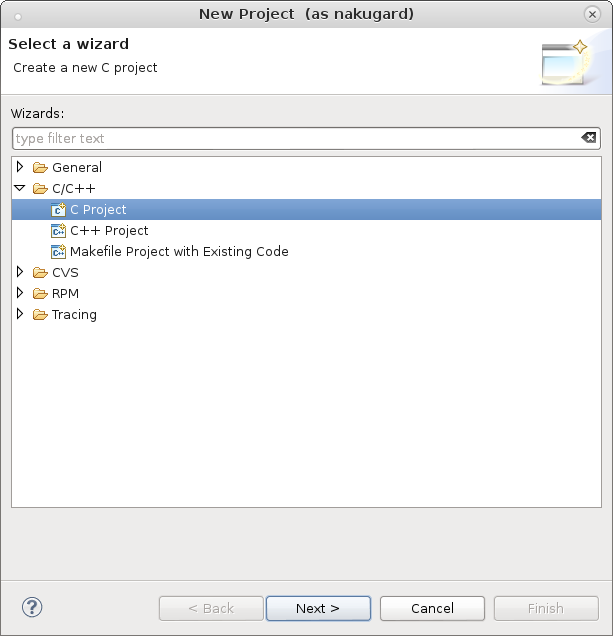
Now we are ready to create the first real project and upload it to the microcontroller. Start your Eclipse IDE and create a new C-project. The following screenshots show you how to configure this project and which compiler to choose. Additionally make sure you have the right programmer and microcontroller selected in the project’s settings.

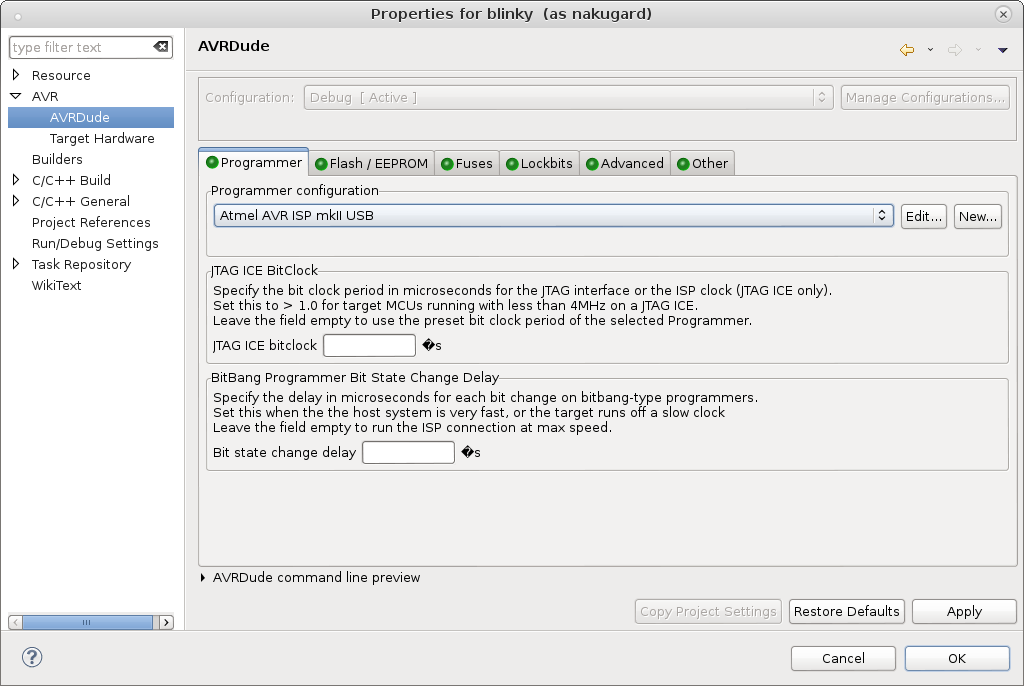
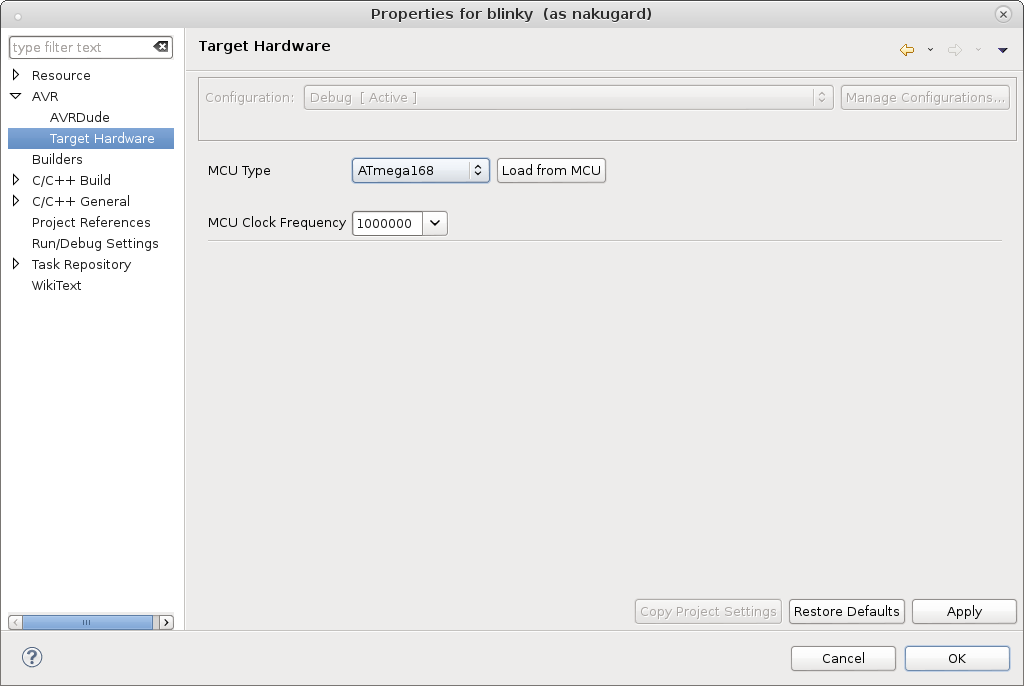
In the last screenshot you’ll see the oscillator frequency. Most Atmel controllers are preconfigured to their internal oscillator that runs at 8 MHz with a prescaler of 1/8th, i.e. at 1 MHz. This setting will however not change the frequency but simply define the F_CPU constant in your source. To actually change the frequency, or to connect an external crystal oscillator, you’ll need to set the appropriate fuse bits. Refer to the Atmel documentation for this, it’s beyond the scope of this tutorial.
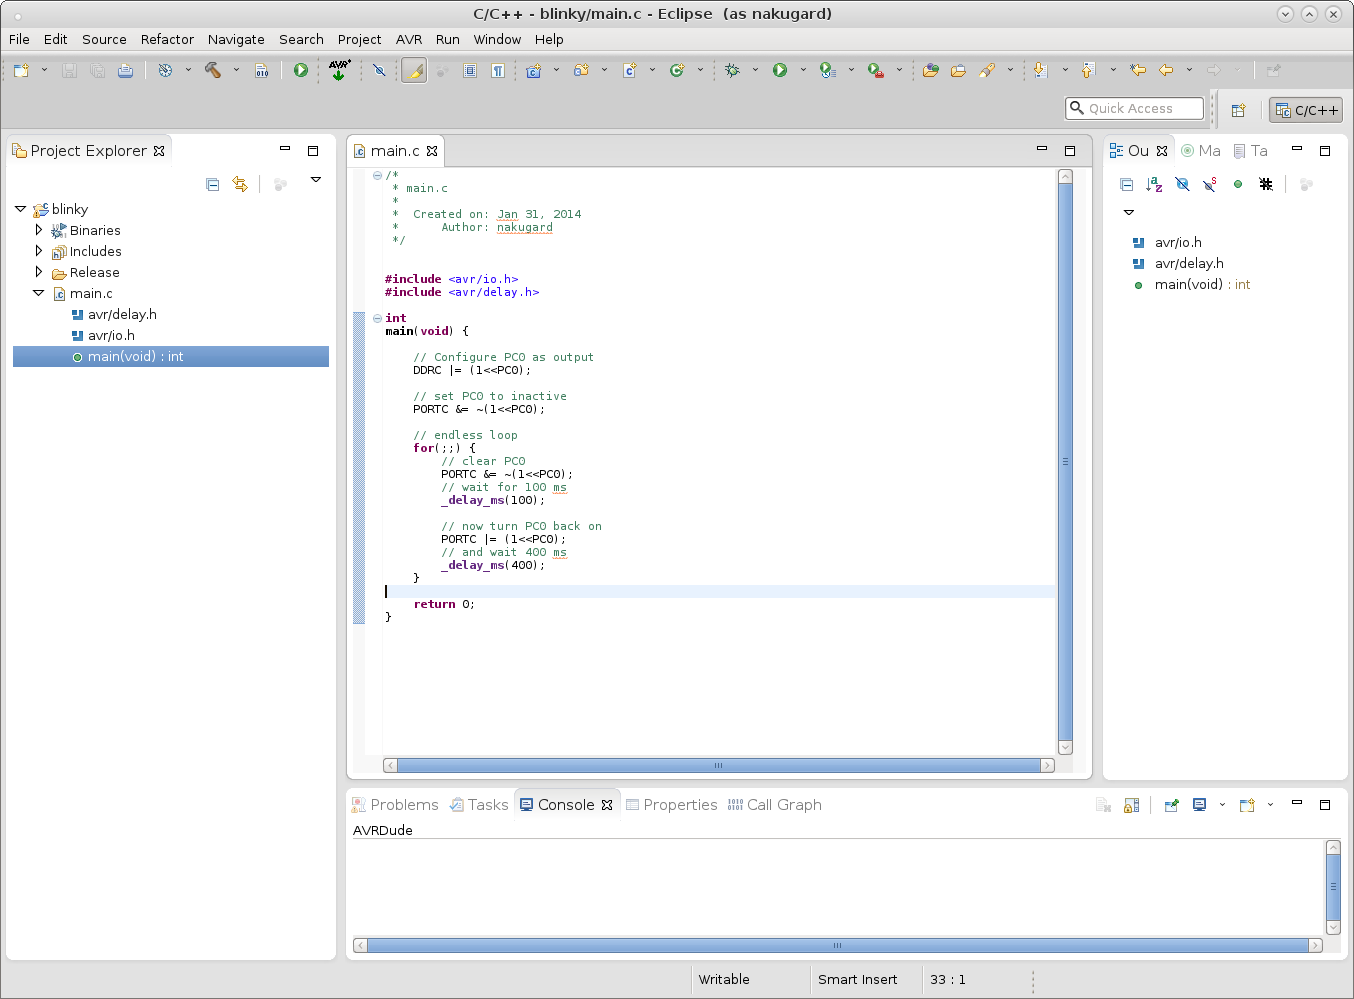
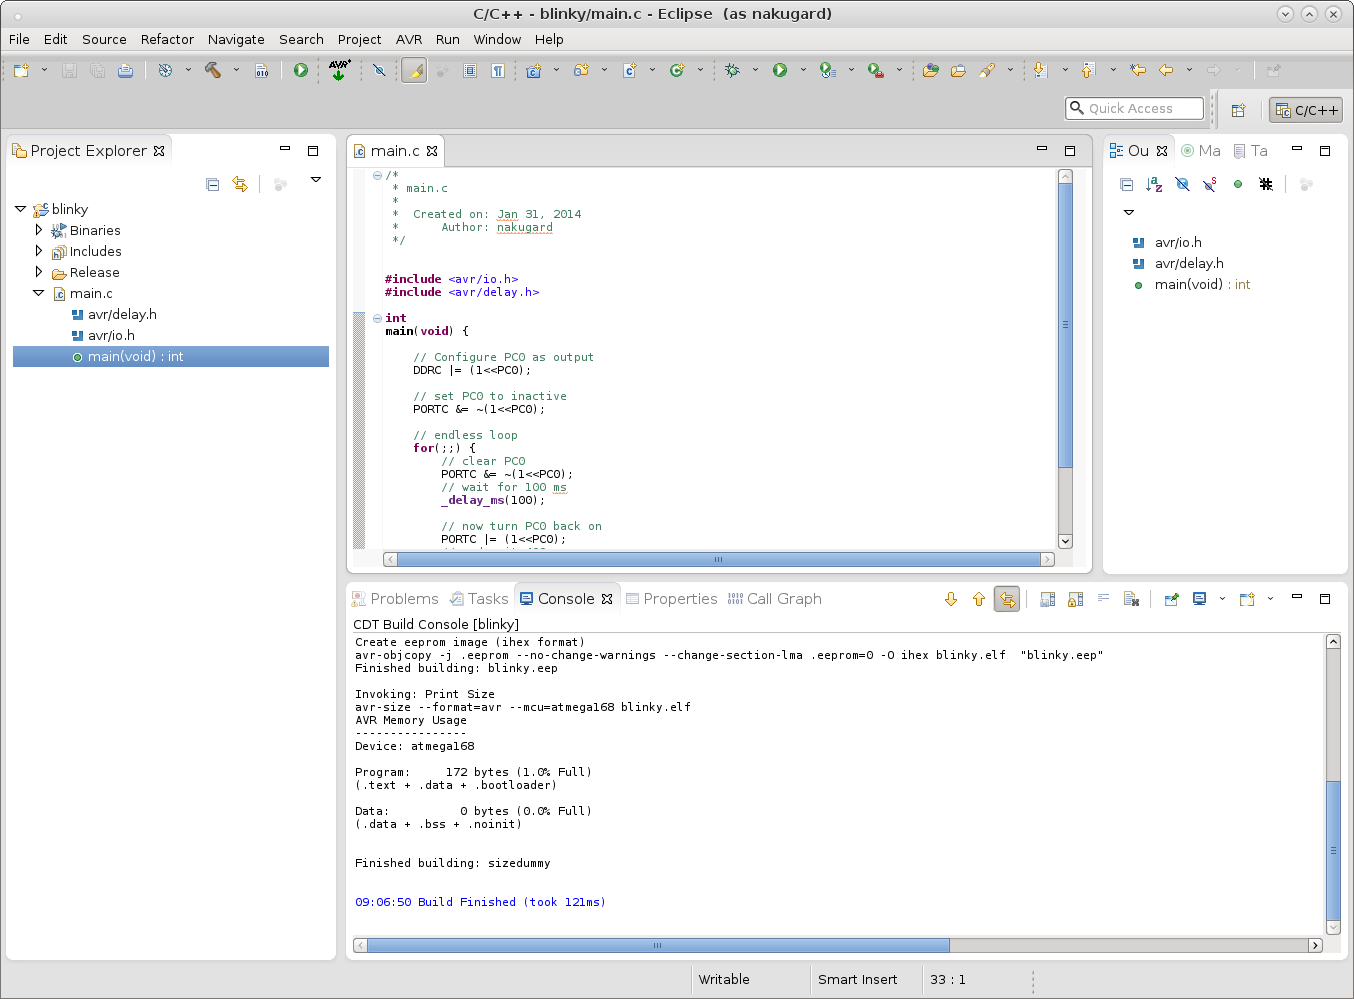
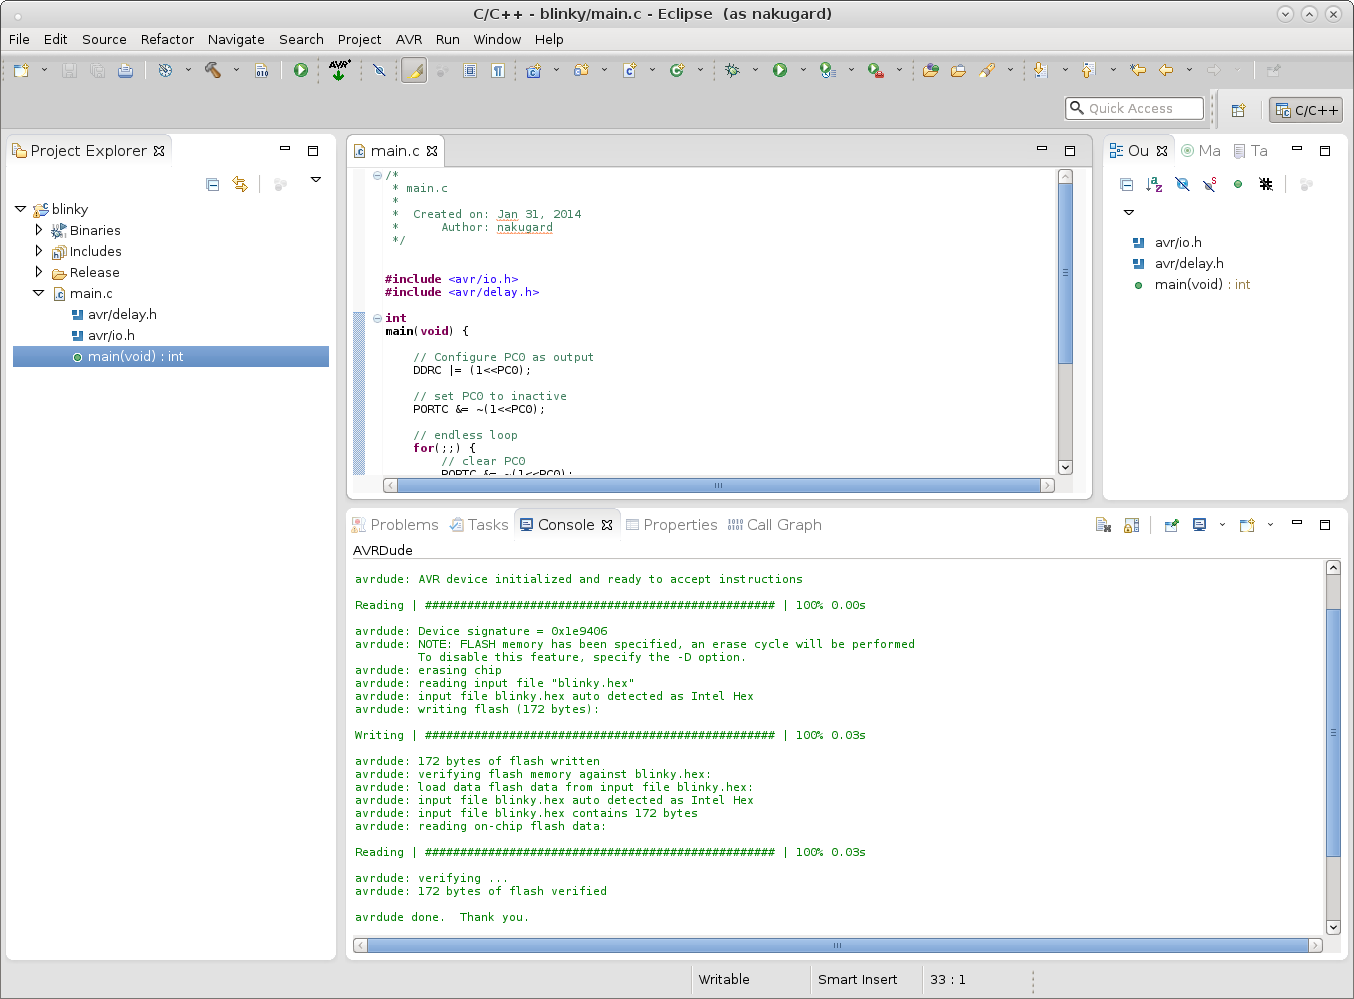
The Hello, World’s source code is pretty simple. It configures the appropriate pin the LED is connected to as digital output and then enters an endless loop in which it toggles the output, waits, toggles again and waits again. Rinse and repeat. That’s all. Ensure that your programmer is still connected to your circuit and you can directly flash the program onto your controller. Afterwards the LED should start blinking right away.
If you disconnect the programmer after flashing chances are the LED stays dark, even when pressing the RESET button. The reason for this is that the programmer’s RESET cable is pulled low when disconnected from the PC. Disconnect this cable and the LED should start blinking again.
That’s it! You’ve successfully programmed your first microcontroller application. 🙂