
As wireless controllers and sensors get cheaper and cheaper and more comfortable to use I decided to finally implement the idea I’ve had for a long time: setting up a wireless sensor network. Apart from being a fun project i will start with a small weather station and later add a automatic plant watering system.
This will be a series of articles which I’ll post as the project progresses. So far I’ve only got some basics done therefore things might change along the way. We’ll see how things will turn out.
A brief history
I already began a similar project a few years back with different hardware parts. It was based on RFM69 radio modules for communication. They’re quite cheap but lack a processor so you need to combine them with, say, an Arduino. There are ready-built boards with everything you need but they are unfortunately a little pricey. In addition, you would have to implement the communication protocol, encryption and everything else. In the end I buried this project because it had become too time consuming for just a fun project.
New approach
I picked the idea up again when I came across MicroPython. Although I have been programming in Python for over a decade this distribution, targeted at microcontrollers, completely eluded me. Of course you need a more powerful processor than a regular Arduino (UNO etc.) for it to run, e.g. ARM Cortex based systems. Even then, any real-time functions will probably be hard to do. But it seems perfect for applications with low computational requirements such as simple wireless sensors.
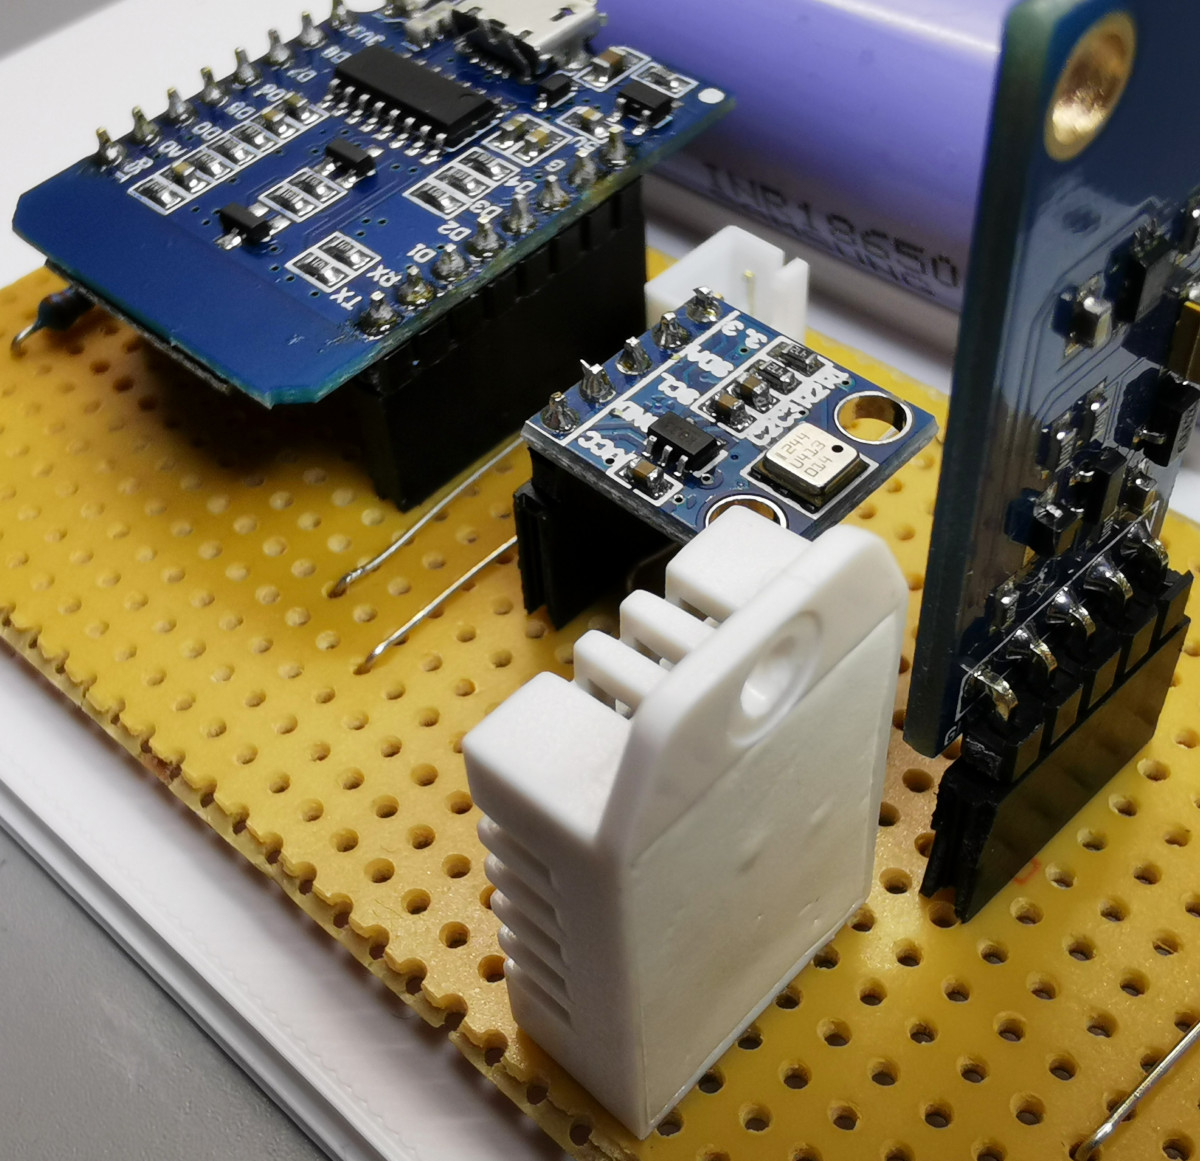
For now I will use the ubiquitous ESP8266 controller family, specifically the Wemos D1 Mini variant for its size. The clients etc. will be connected to a private wireless network and subscribe/publish to a MQTT broker that runs on a Raspberry Pi. Human interaction is done with the Home Assistant automation server.
Article series layout
In this first article I will describe the basic setup, the components and the overall plan. It is not set in stone and might change over time. There will probably be three articles in this series, covering the following topics:
- Part 1: General overview (this part)
- Part 2: Adding MQTT entities to Home Assistant
- Part 3: Building a weather station
- Part 4: Building an automated plant watering system
I might add more parts later on, it depends on where this is going. We’ll see. 😉
The Big Picture
At first I’d like to present the general layout of everything. The central hub is the Raspberry Pi. It needs to be a recent version 3 or 4 because we use the WIFI interface as well as the Ethernet connection. On it we create a new WIFI network solely for the wireless clients to connect to. There will be no forwarding between the local network and the sensors’ WIFI except by messages sent through the MQTT broker. The setup is depicted schematically below.
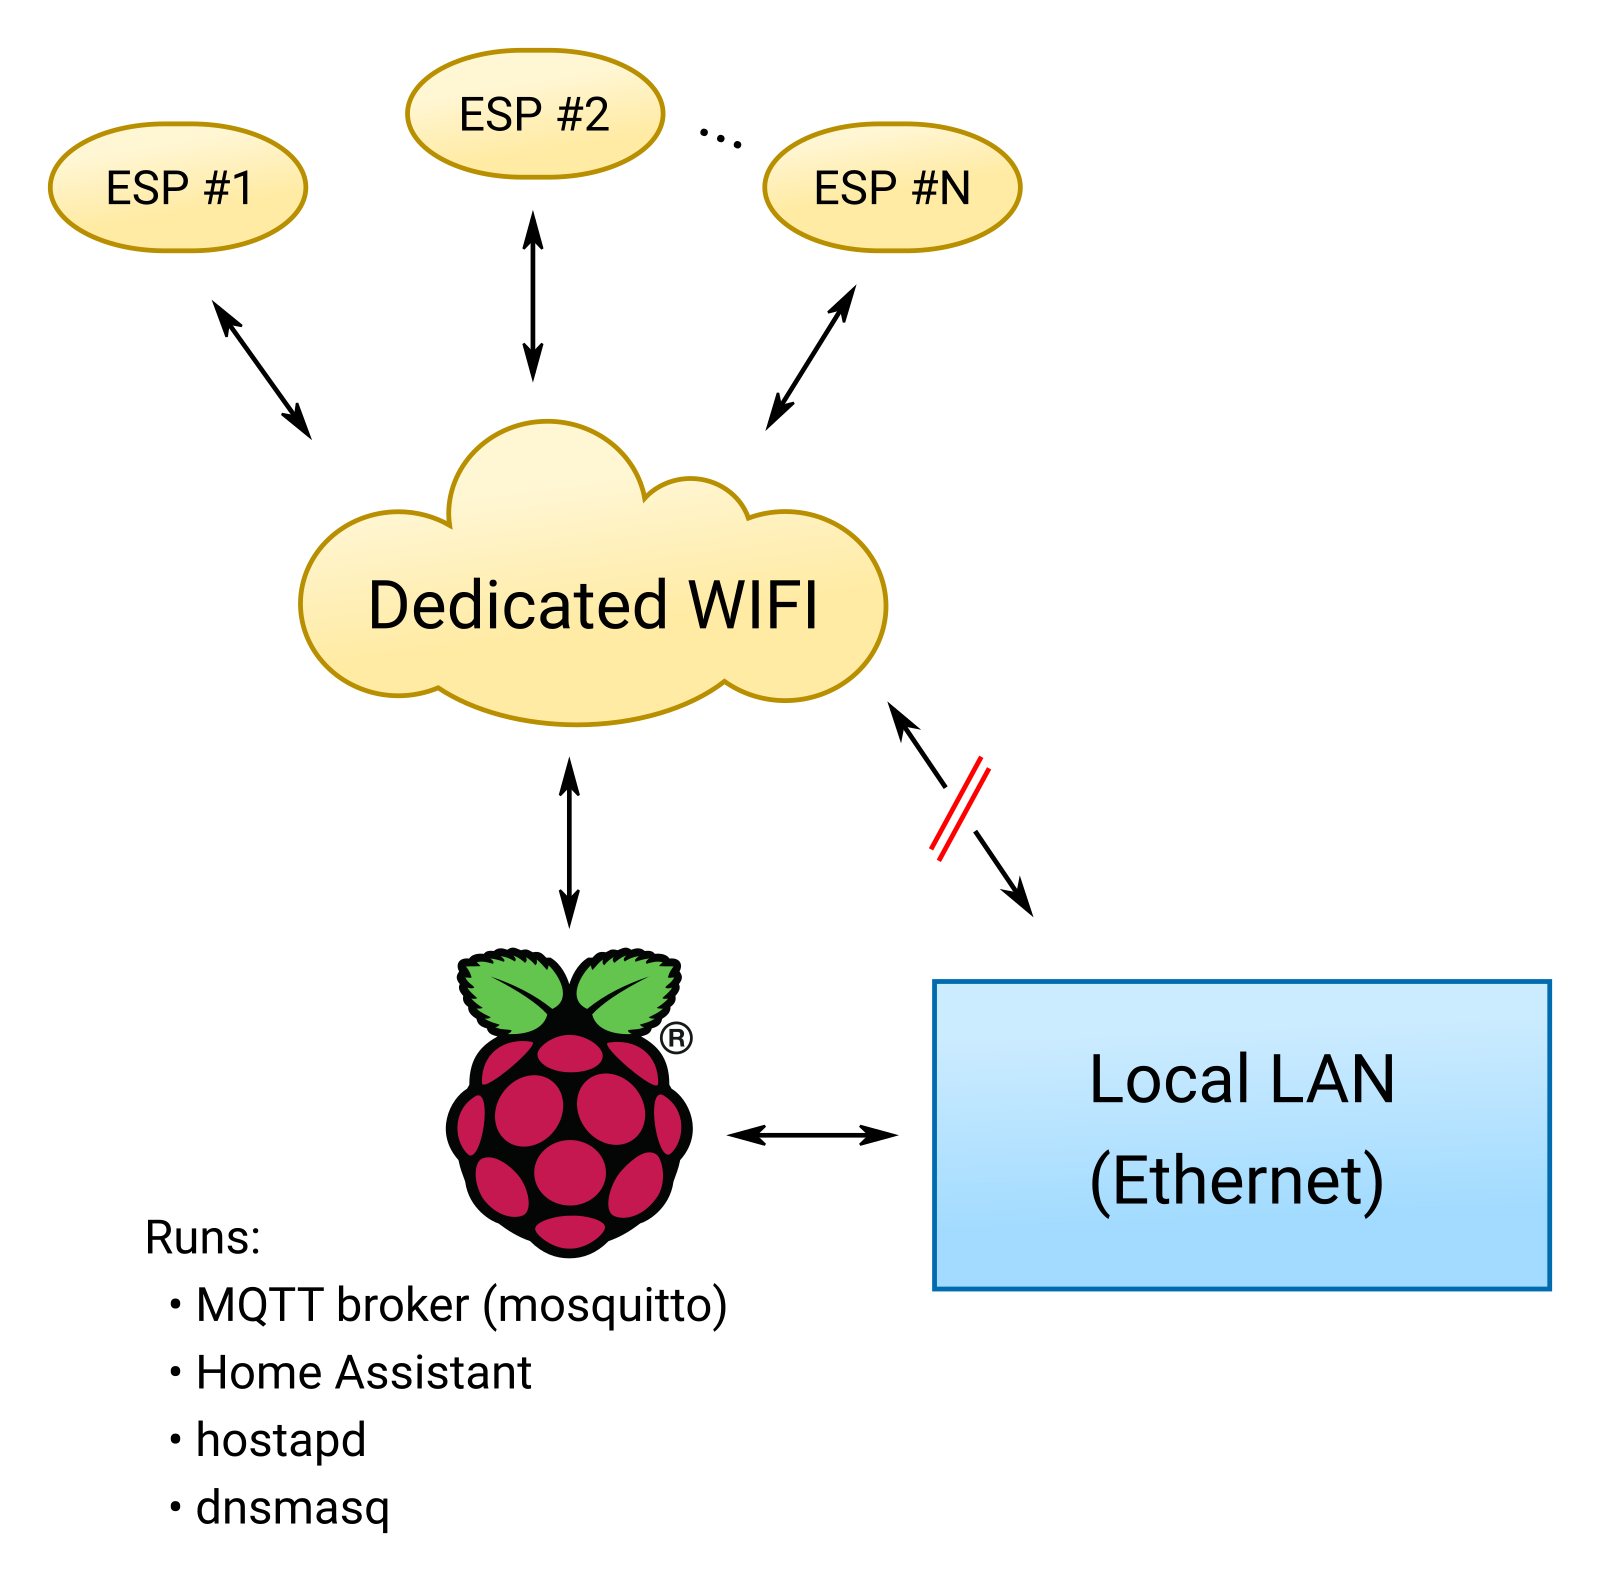
The following software packages are used:
- Mosquitto for the MQTT broker (incl. authentication)
- hostapd to create the WIFI access point
- dnsmasq for DHCP on the private WIFI
- Home Assistant for the user interface
Set up instructions
This section will give short instructions on how to get the specific software packages up and running. I will assume you already have installed a basic Raspbian system on the Pi. Before we begin with the servers we need to configure the network properly. On the wireless network we will use a regular class C private network that of course should be distinct from the regular LAN. Please adjust the following guide according to your specific setup/needs.
Commands below should be run as root or via sudo, whichever you prefer. Lines starting with $ in the quotes indicate that this particular line is a command to be run on the console.
First, head over to /etc/network/interfaces.d and create two files: eth0 and wlan0
# /etc/network/interfaces.d/eth0
#
# If you want to give this PI a static address you can change the
# lines below accordingly
#
auto eth0
iface eth0 inet dhcp
# /etc/network/interfaces.d/wlan0
#
# We give the wifi interface a static IP and let the clients receive
# their addresses via DHCP
#
auto wlan0
iface wlan0 inet static
address 192.168.200.1
netmask 255.255.255.0
broadcast 192.168.200.255
# start/stop services on up/down
up systemctl start hostapd
up systemctl start dnsmasq
down systemctl stop hostapd
down systemctl stop dnsmasqTo keep the two services mentioned in the wlan0 file otherwise inactive set them to disabled with systemctl:
$ systemctl disable hostapd
$ systemctl disable dnsmasq
Only one small thing more to do. Edit /etc/sysctl.conf and ensure that IP forwarding is disabled by uncommenting and changing the following lines:
net.ipv4.ip_forward=0
net.ipv6.conf.all.forwarding=0
Now we can start installing the required software.
Mosquitto – MQTT Broker
First, install the broker with apt-get.
$ apt-get install mosquitto mosquitto-clientsIt only requires minimal configuration such as user authentication. Edit /etc/mosquitto/mosquitto.conf and make sure the following lines are present:
allow_anonymous false
password_file /etc/mosquitto/mpasswd
This forbids any anonymous connection and tells the server where to find the user credentials. We need to create this file with:
$ mosquitto_passwd -c /etc/mosquitto/mpasswd <MQTT_USERNAME>Replace <MQTT_USERNAME> with a username of your choice. It will ask you for a password interactively. Then restart the server and we’re done with this part.
hostapd – The WIFI access point
At first, again, install the package with apt-get:
$ apt-get install hostapdNext, create a proper config file in /etc/hostapd/hostapd.conf. You can find my local version below, adjust it to your liking.
# basic setup
driver=nl80211
interface=wlan0
ssid=YOUR_WIFI_NAME
# authentication algos: 1 = WPA (2 = WEP, 3 = both)
auth_algs=1
wpa=2
wpa_passphrase=YOUR_SECRET_PASSWORD
wpa_key_mgmt=WPA-PSK WPA-PSK-SHA256
# use a free channel, if possible
channel=8
# set to 1 (or 2 for some devs) to hide SSID
ignore_broadcast_ssid=0
# advertise country code
ieee80211d=1
country_code=DE
# wifi mode (a,b,g...)
hw_mode=g
Restart the server (or bring the wlan0 interface up) and you should be able to find the new wireless network.
dnsmasq – DHCP server
Almost done, two more to go. As always, install it with:
$ apt-get install dnsmasqThe default config is pretty long and well documented. I would recommend to change the settings listed below in their respective locations. But you could also create a fresh file with only those lines (should work, however I did not test this).
port=0
# we don't want DNS resolution
no-resolv
no-poll
# the interface to listen on
interface=wlan0
# we don't want dnsmasq to listen on these interfaces
except-interface=eth0
except-interface=lo
bind-interfaces
# the DHCP address range to use for the sensors etc.
dhcp-range=192.168.200.10,192.168.200.250,255.255.255.0,12h
Home Assistant (HA)
Now comes the tricky part. It is not actually difficult to set up Home Assistant but it requires a certain amount of work if it should run automatically on boot as a non-privileged user. It is written in Python and available through the PyPi servers. The following steps are necessary.
- Create a new user to run HA
- Install HA via pip
- Create a systemd service to run HA at boot
- Configure HA (we only consider the MQTT part here)
The first two steps are pretty well documented on the Home Assistant website so I will not repeat them here. I followed this guide. All files get installed in a separate directory under /srv. Once this is all set up a new systemd service file is required. Create the file /etc/systemd/system/homeassistant.service with the following content and replace YOUR_HA_USER with the appropriate user account.
[Unit]
Description=Home Assistant
After=network-online.target mosquitto.service
[Service]
Type=simple
User=YOUR_HA_USER
ExecStart=/srv/homeassistant/bin/hass -c "/home/YOUR_HA_USER/.homeassistant"
[Install]
WantedBy=multi-user.target
Restart systemd so it knows about the service and you can start HA.
$ systemctl daemon-reload
$ systemctl start homeassistant
Afterwards you should be able to reach the web interface on http://IP_ADDRESS:8123
Further Configuration
Configuring Home Assistant can be quite time consuming, depending on the other devices you wish to integrate. I will therefore focus only on anything related to MQTT: Tell HA about your MQTT broker and activate the device discovery.
If you still use the default Lovelace web interface all new devices will automatically appear on the start screen of HA. If you however modified the web UI you will need to tell HA explicitly about all new entities. But we will get to this in a later article when we actually add some ESP clients. For now, just add the next lines to your HA configuration.yaml (located at /home/YOUR_HA_USER/.homeassistant/configuration.yaml).
mqtt:
        broker: 127.0.0.1
        username: !secret mqtt_user
        password: !secret mqtt_pass
        discovery: true
        discovery_prefix: homeassistant
it’s recommended practice not to write secrets, such as passwords, directly in the configuration but in a separate secrets.yaml file.
Summary
Let’s summarize where we are so far. At this point the Raspberry Pi should be ready and provide a private wireless network that all controllers can connect to. It furthermore presents a web interface to the local LAN network to view/interact with the devices. All necessary daemons should automatically start up when the Pi boots.
What still needs to be done is the MQTT topic layout (think of it as a folder hierarchy) that is used by the different clients, and of course the clients themselves. This will be presented in the next article.
Until then, happy hacking! 🙂