
Lasers are fun, especially high-power ones. Some time ago I purchased a 1 W blue laser and due to a recent 3D printer upgrade I had some spare linear motion components. The next steps are quite obvious, build a 2D laser engraver! I’ve always liked the CoreXY kinematic design and chose to use it in this project.
Mechanical setup
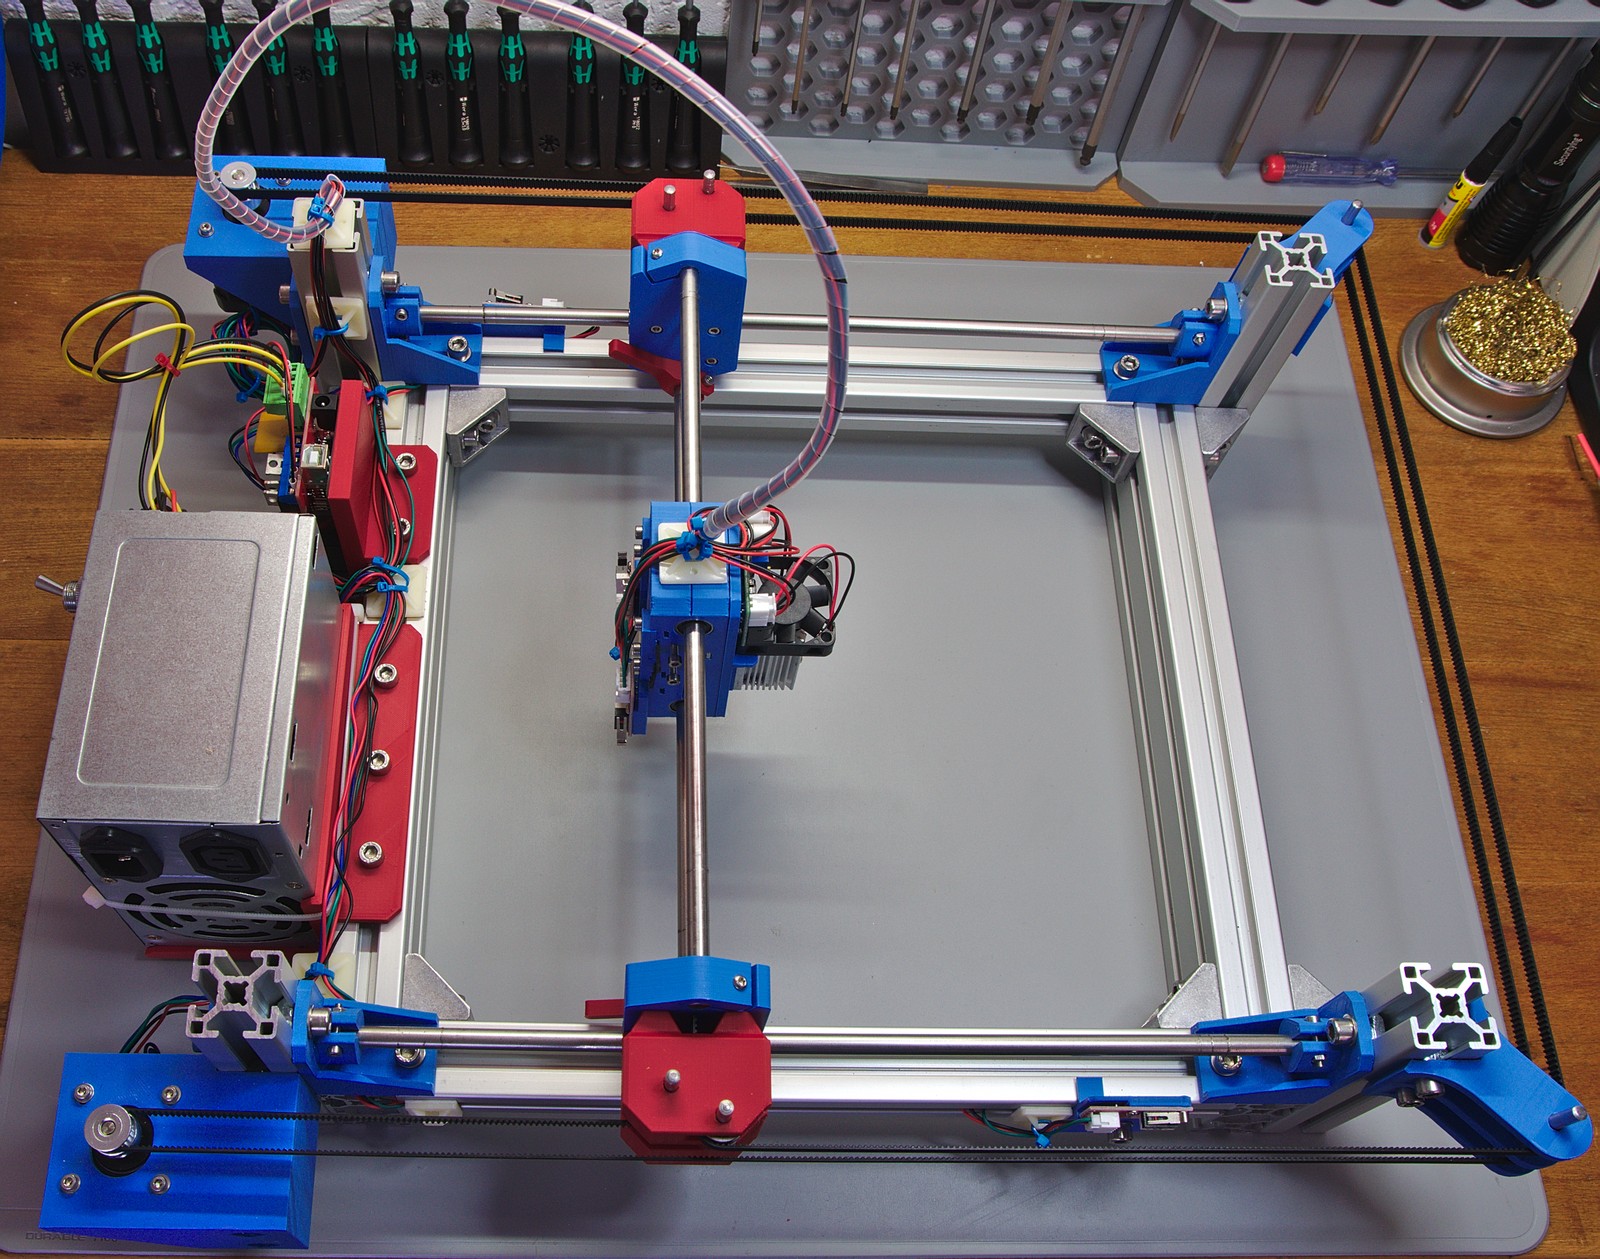
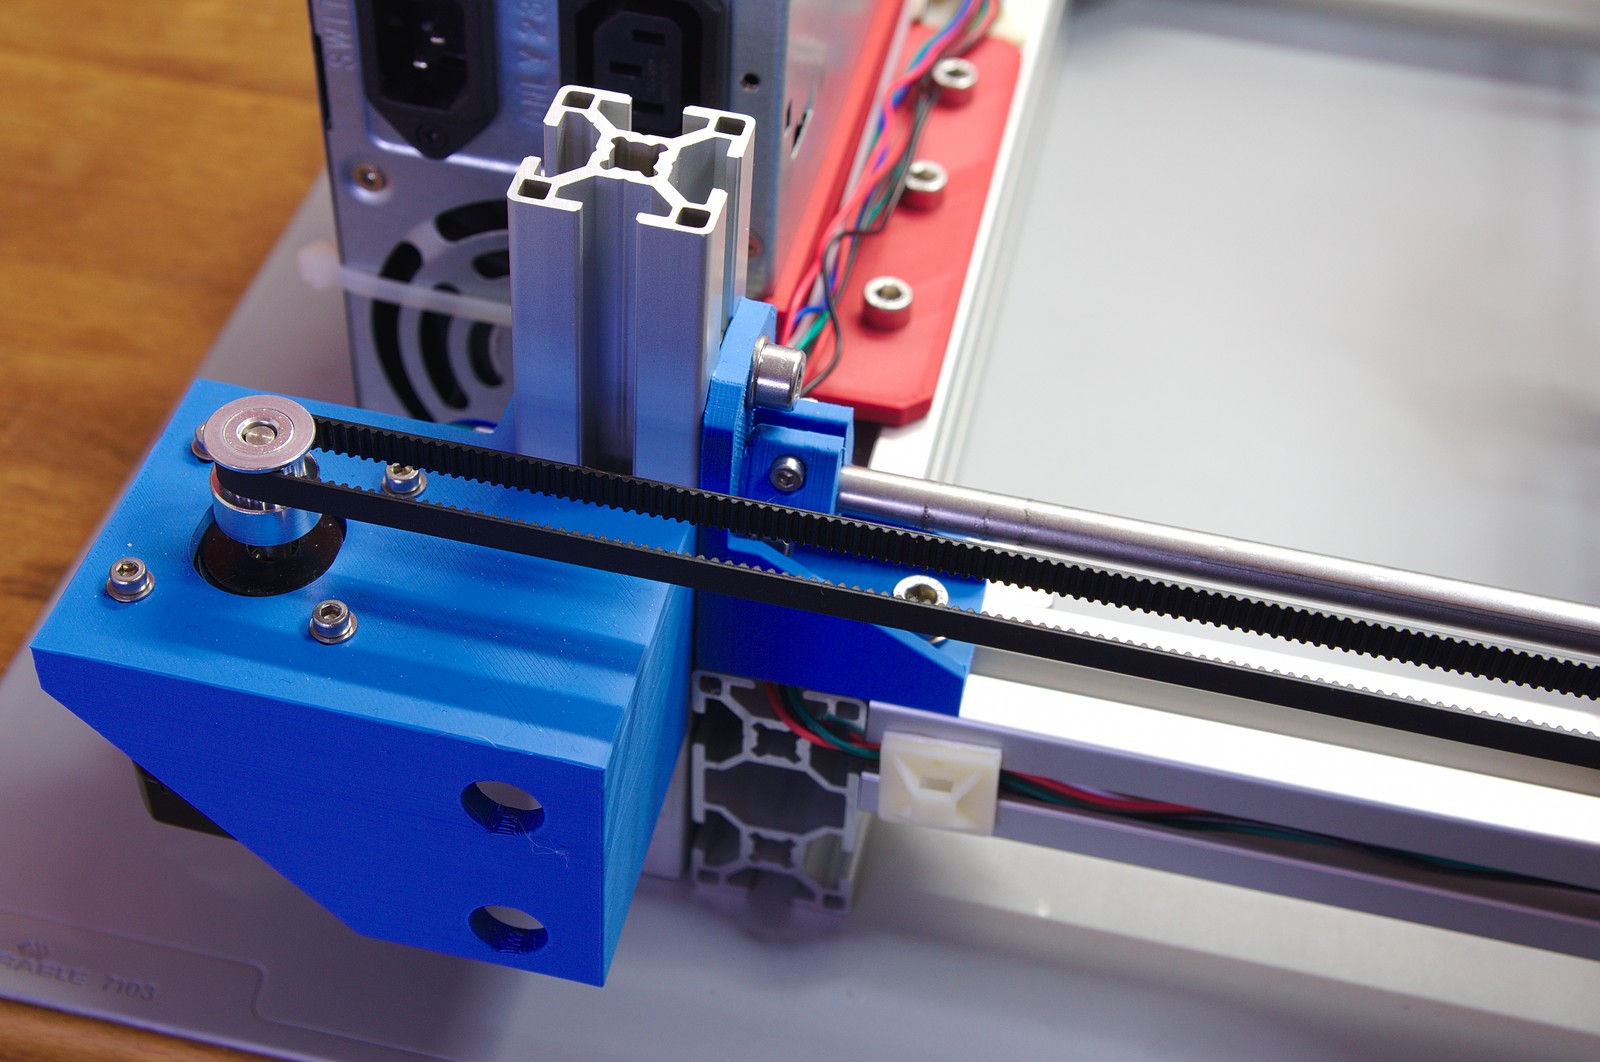
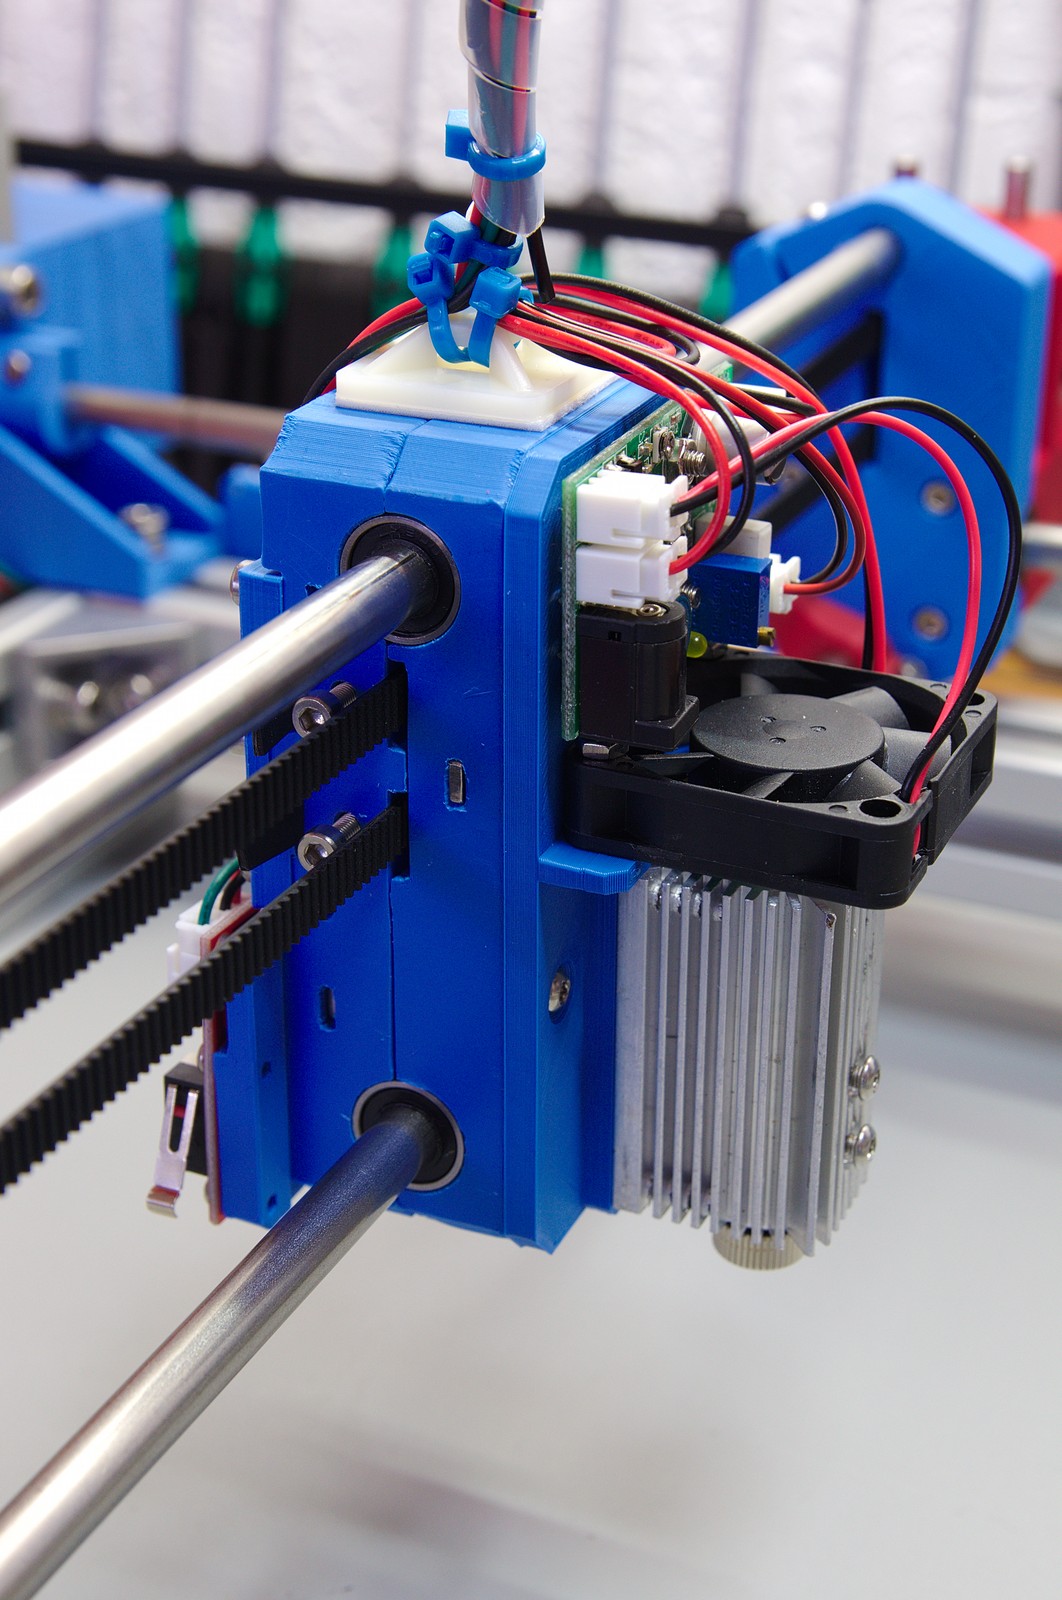
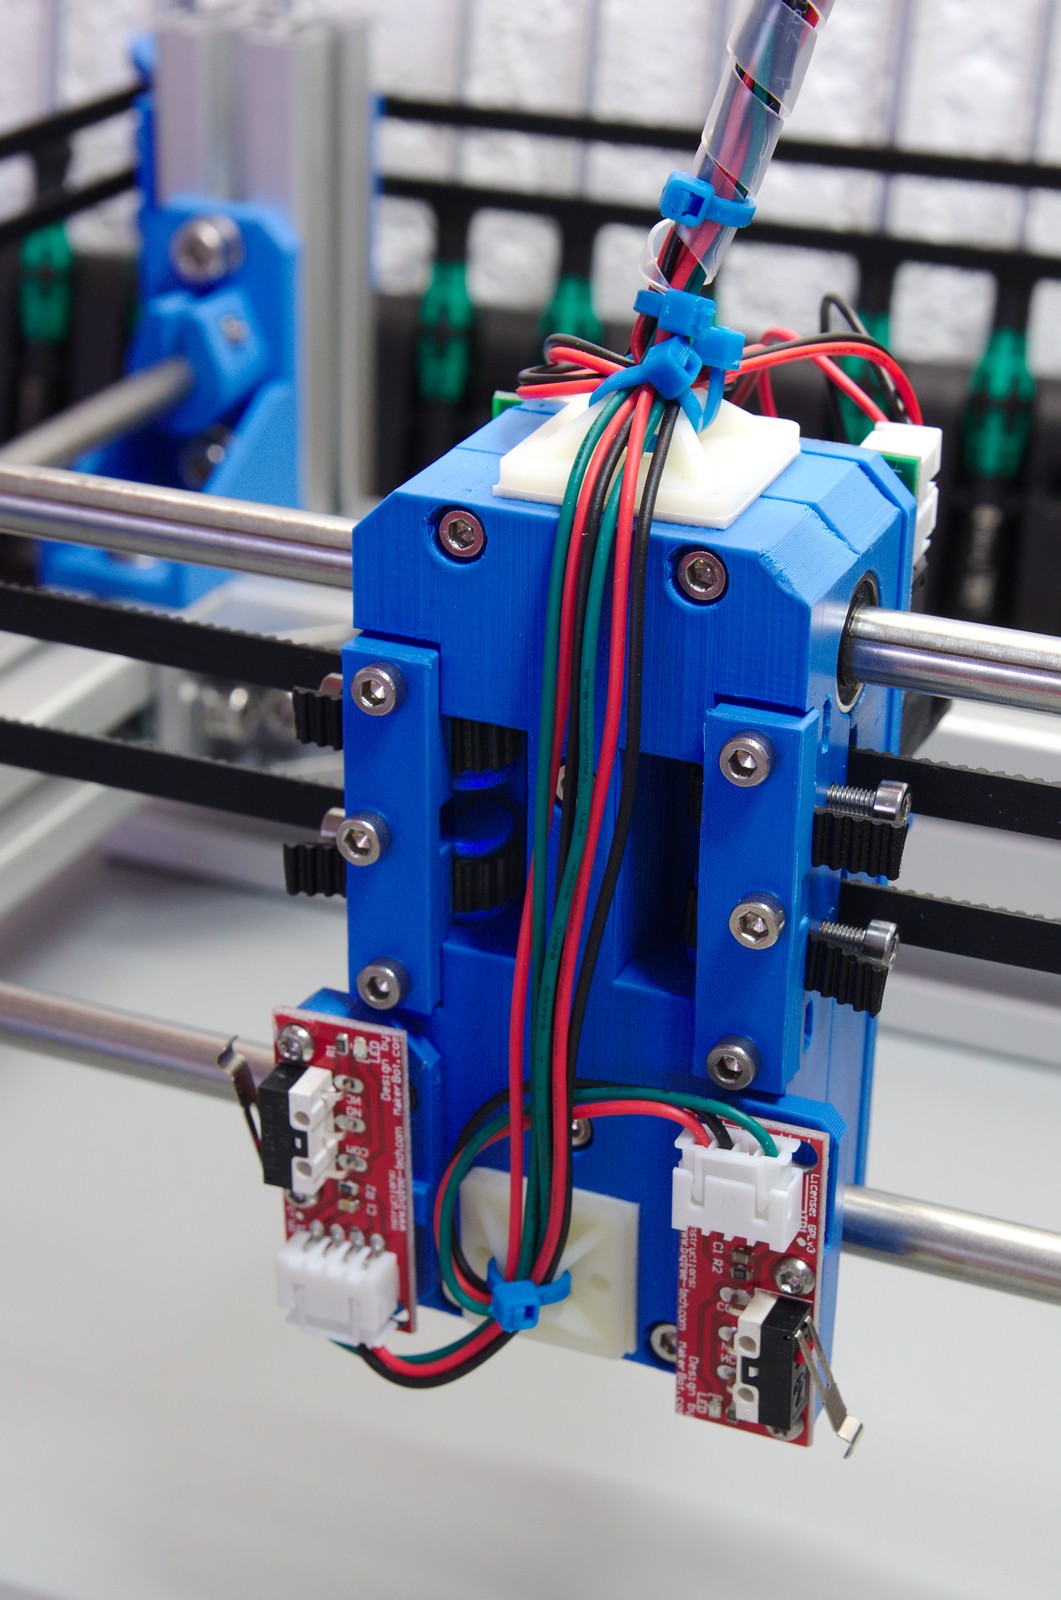
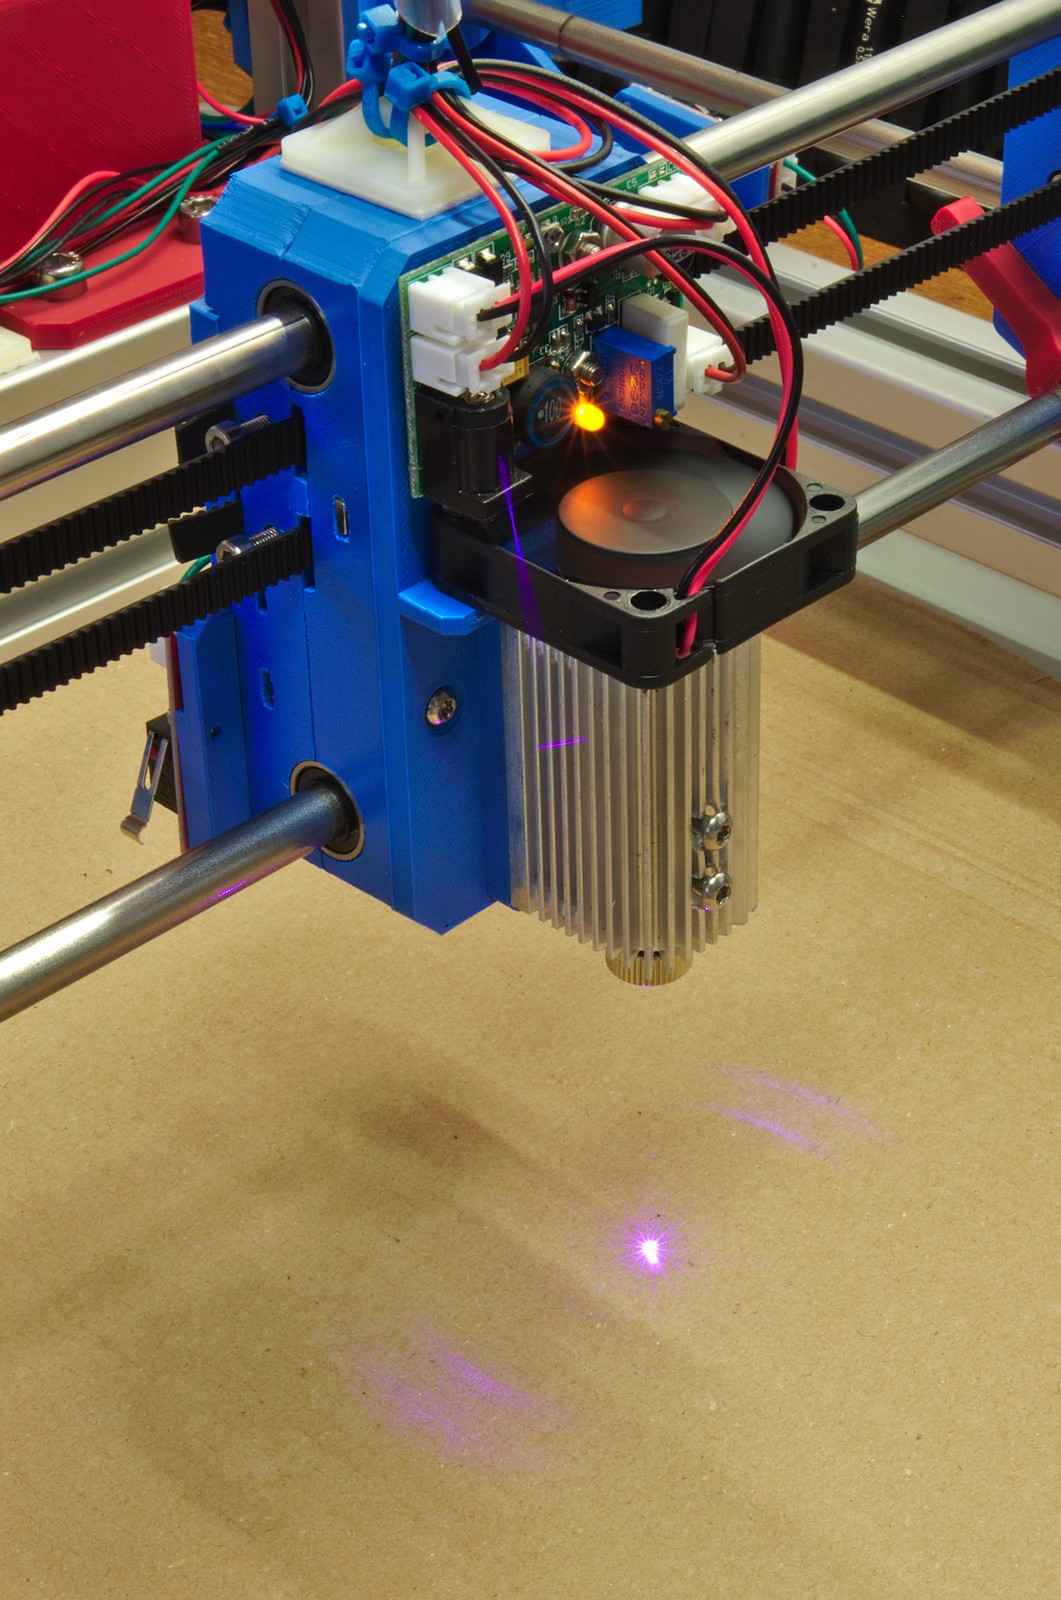
The mechanical setup is quite simple with only two axes (no Z axis). The laser is mounted on a carriage with its driver and controlled by two stepper motors. Instead of the cartesian motion system, where one motor moves one axis, I opted for the CoreXY system. Its prominent feature is that both motors are stationary in contrast to the cartesian setup where one motor is mounted on the moving first axis. In order to move the carriage both motors have to be driven at the same time, however. The benefit is a lower moving mass and potentially higher speeds. This is opposed by higher complexity in driving the motors and possibly higher power consumption as both motors are always on. If you like more details refer to this excellent description.
My setup is build around the spare linear rails I had from my Prusa i3 MK2/S upgrade. They are 330 mm and 370 mm in length. In the end I achieve a 210×220 mm working area with some buffer at all ends. If you want you could squeeze out some more. I took some inspiration from other systems, like the excellent 3D printers HyperCube and HyperCube Evolution.
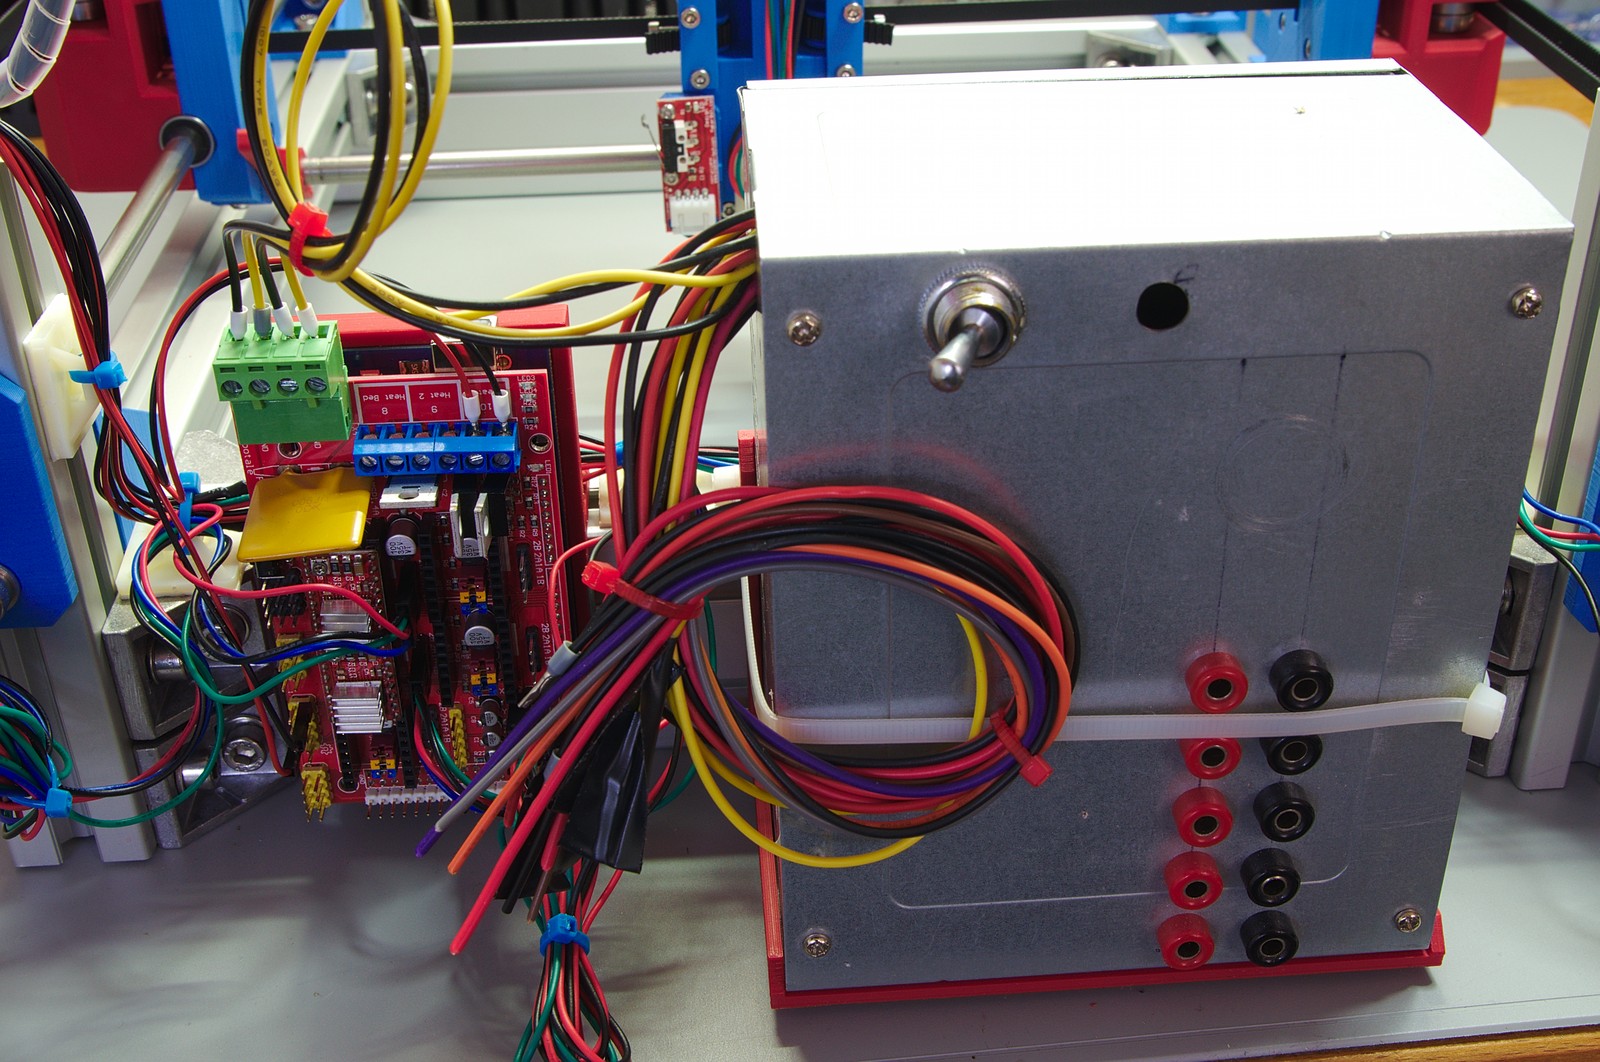
The motion base is assembled from 30×30 mm and 30×60 mm aluminum extrusion profiles to get good stability. All other mounting components are 3D printed. To control the motors and laser I used an Arduino Mega and Ramps 1.4 board I already had. However, I’d recommend an Arduino Uno with a CNC shield due to some issues with the GRBL software. This is the hardware platform it was designed for and works best. To get GRBL working correctly with the CoreXY setup on an Arduino Ramps I had to implement some modifications. They are available from my GitHub site.
All 3D parts you need are downloadable at the bottom or available from Thinigiverse. You will further need the following parts:
- 1x Arduino Mega / Uno
- 1x Ramps / Arduino CNC Shield
- 2x Pololu Stepper driver (A4498, DRV8825, SilentStepStick)
- 4x Endstops (Makerbot)
- 1x Laser with TTL driver
- 1x Power supply (e.g. old ATX)
- 1x Fan 12V (for the laser)
- 2x Nema 17 stepper motor
- 2x 8mm Rod, 370 mm (Y axis)
- 2x 8mm Rod, 330 mm (X axis)
- 8x LM8UU linear bearing
- 16x Ball bearing 625 ZZ
- 6x 5mm steel rod, 40 mm
- 2x GT2 Pulley, 20 teeth
- ca. 4m GT2 belt
- 2x Aluminum profile, 30×30 B (8 mm slot), 325 mm
- 4x Aluminum profile, 30×30 B (8 mm slot), 100 mm
- 2x Aluminum profile, 30×60 B (8 mm slot), 360 mm
- 12x Corner mounting brackets 30×30
- M6 T-slot nuts
- M6x12 screws
- M3x16 countersunk head
- M3x16 head cap screw
- M3x20 head cap screw
- M3x25 head cap screw
- TP screws, 2.5 mm (endstops, Arduino mounting)
- M3 square nuts
- M3 hex nuts
Here are some images of the finished system.


Using the engraver
The build process was quite straight forward without any major issues. Actually using the system proved to be much more difficult as to find the right software for G-Code generation. There are several software tools out there but not all are working as smoothly as I wished for. Here are the tools I use for different purposes.
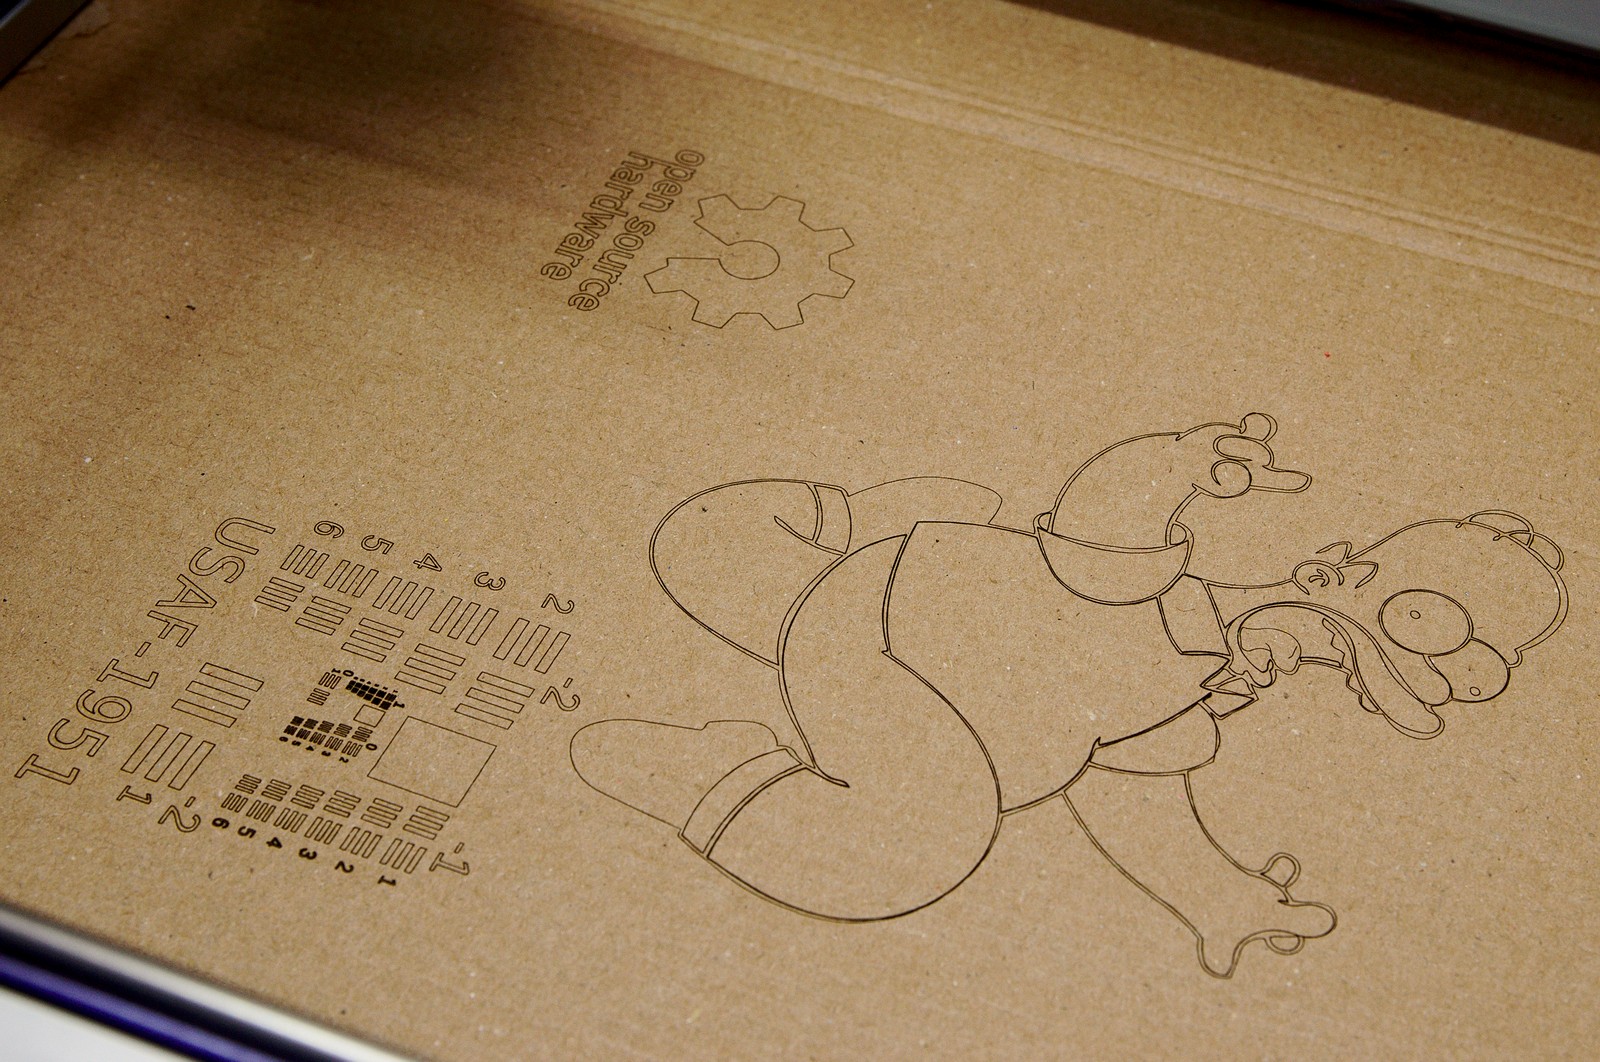
Contour engraving / cutting
If all you need is to engrave a contour or line the best option is the J Tech Inkscape Plugin. With this you can transform any vector contour into proper G-Code with any hassle. I didn’t have any issues with it so far.
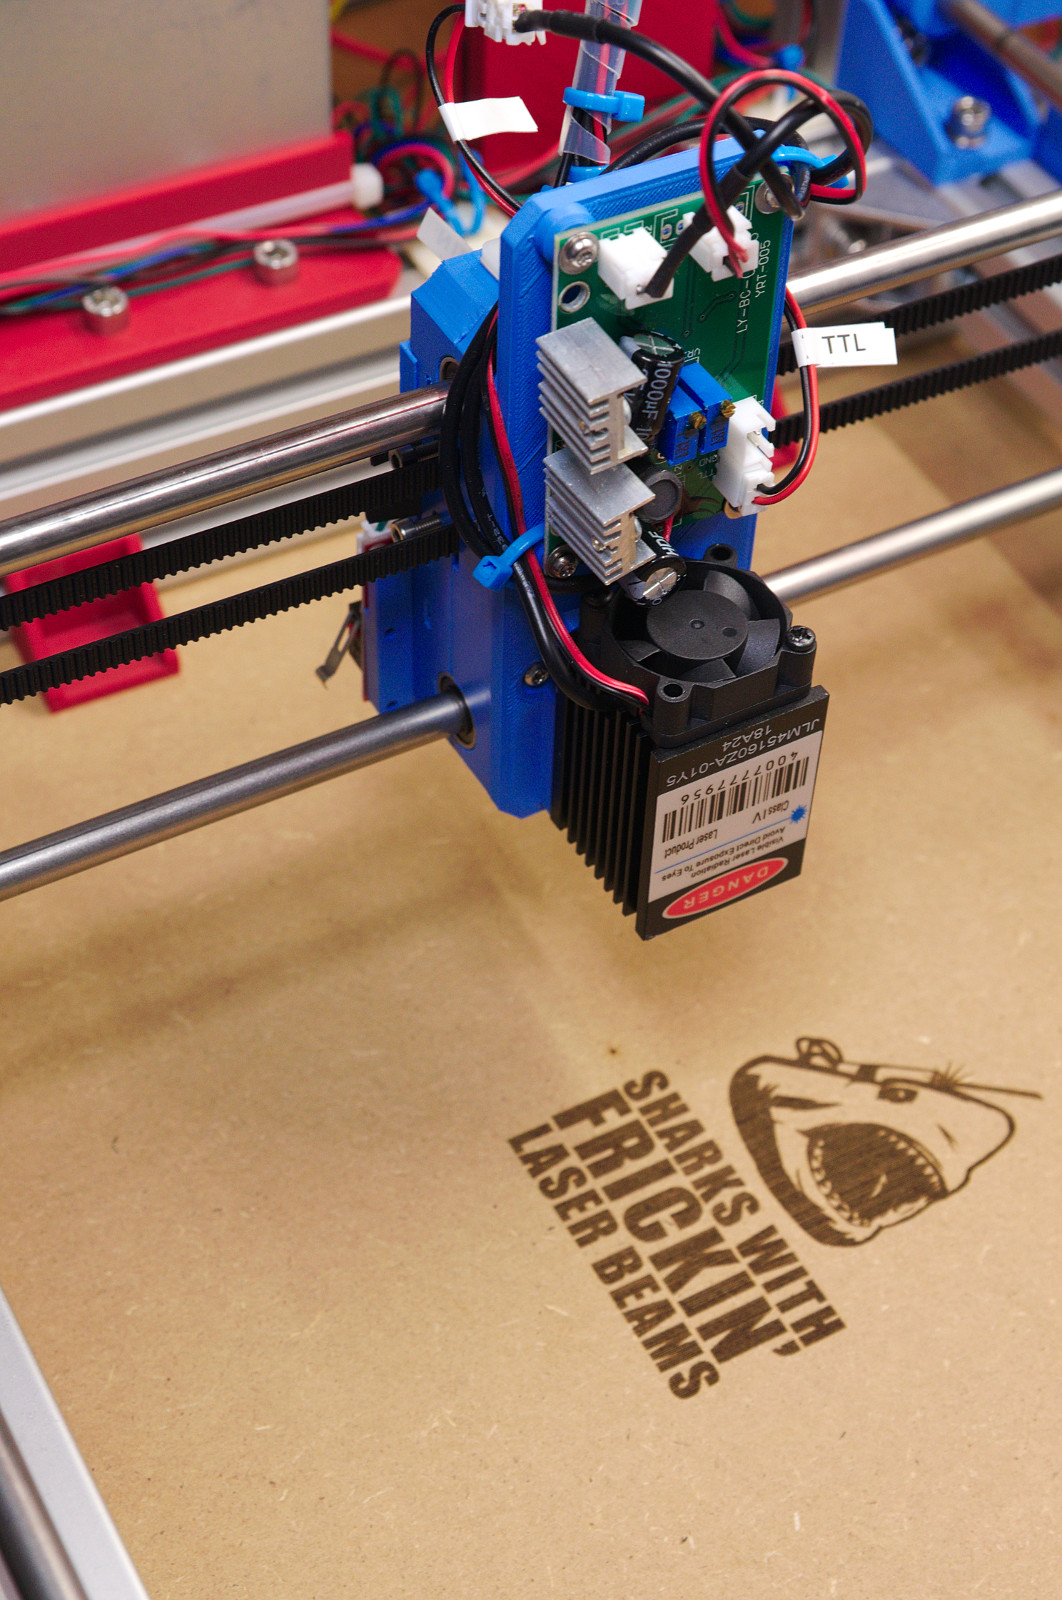
Area engraving
Engraving a full area is a more complicated issue. Many tools claim to do this easily, some are Inkscape plugins as well while others are regular applications. The best option in my opinion here is LaserWeb 4. It takes some getting used to but it’s very configurable and generates G-Code that works fine.
G-Code streaming
Once you have the G-Code you have to send it to the printer somehow. I personally prefer the Universal G-Code Sender as it’s compatible wit GRBL and also let’s you control your machine manually, too.
ChangeLog
- 2018-03-29
New laser tool mount for the very common 2.5 W blue laser module added. - 2018-02-24
Initial version uploaded.
Summary
My engraver is built and so far working really nice. The accuracy of this simple machine is better than I initially hoped for and with the new 2.5 W laser the performance is quite impressive. But remember, never look into the beam with your remaining eye!
In a future version I would probably do a few things differently, such as
- Larger working distance
With the short distance this machine currently has the lens has to be moved pretty far away from the diode. In this position it is quite loose, probably does not capture the full beam anymore and one cannot engrave larger objects. - Motorized Z axis
Makes the focus adjustment much easier. It was not done in this build to get the maximum work area. - Cable chains
Not only looks nicer but also adds some safety. - End stops
I don’t really like the end stop placement in this machine… they were added quite late in the design process and it shows.